The Nightmare, also known as the Nightmare of Ashihama, is a Level 814 monster found in Morytania. It is mainly killed in a 5-man group; however, smaller group sizes can get similar profit rates. All profit from killing the Nightmare comes from its unique drops, such as the staff, mace, and armour, which have a 1/85 drop rate, or the orb, which has a chance of 1/320.
The Nightmare is located in the Sisterhood Sanctuary under the town of Slepe.
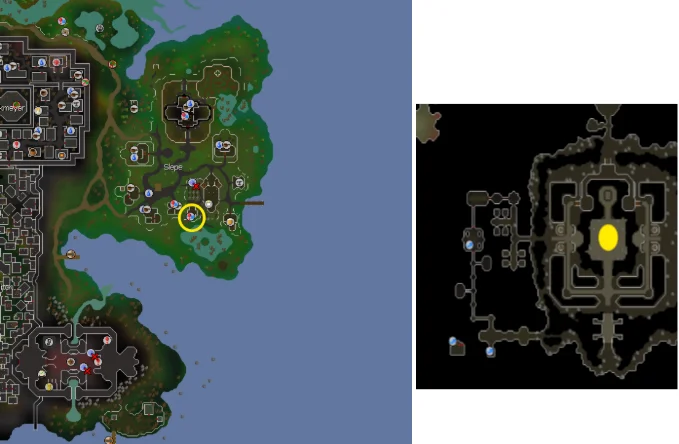
Here are the fastest ways to get here:
Here are the official worlds that have been assigned to the Nightmare:
Players are advised to bring both melee and magic gear setups. Melee should be used to attack the Nightmare directly, and magic should be used on the totems.
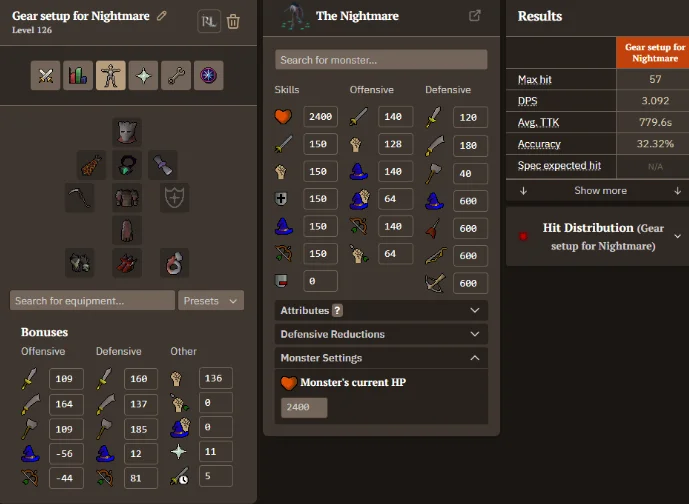
Head slot: Inquisitor's great helm
Neck slot: Amulet of rancour
Cape slot: Infernal cape
Body slot: Inquisitor's hauberk
Leg slot: Inquisitor's plateskirt
Weapon slot: Scythe of Vitur
Ammo slot: Rada's blessing 4
Glove slot: Ferocious gloves
Boot slot: Primordial boots
Ring slot: Ultor ring (i)
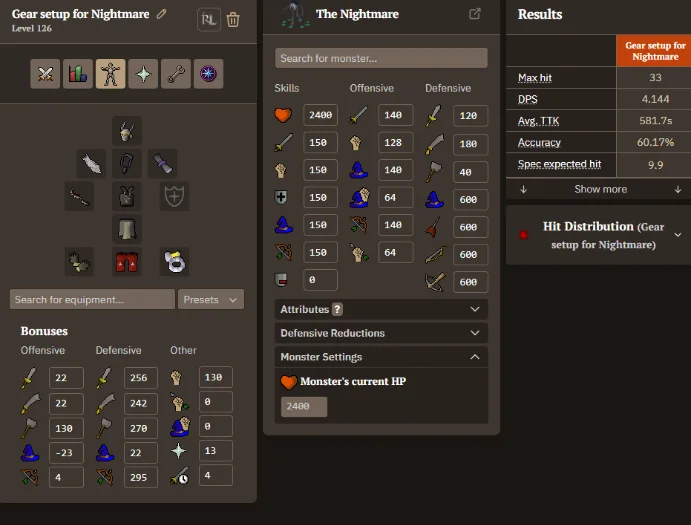
Head slot: Neitiznot faceguard
Neck slot: Amulet of Fury
Cape slot: Mythical cape
Body slot: Bandos chestplate
Leg slot: Bandos tassets
Weapon slot: Abyssal bludgeon
Ammo slot: Rada's blessing 4/arrows
Glove slot: Barrows gloves
Boot slot: Dragon boots
Ring slot: Berserker ring (i)

Head slot: Ancestral hat
Neck slot: Occult necklace
Cape slot: Imbued God cape
Body slot: Ancestral robe top
Leg slot: Ancestral robe bottom
Weapon slot: Tumenken's shadow
Ammo slot: Rada's blessing 4
Glove slot: Tormented bracelets
Boot slot: Eternal boots
Ring slot: Magus ring
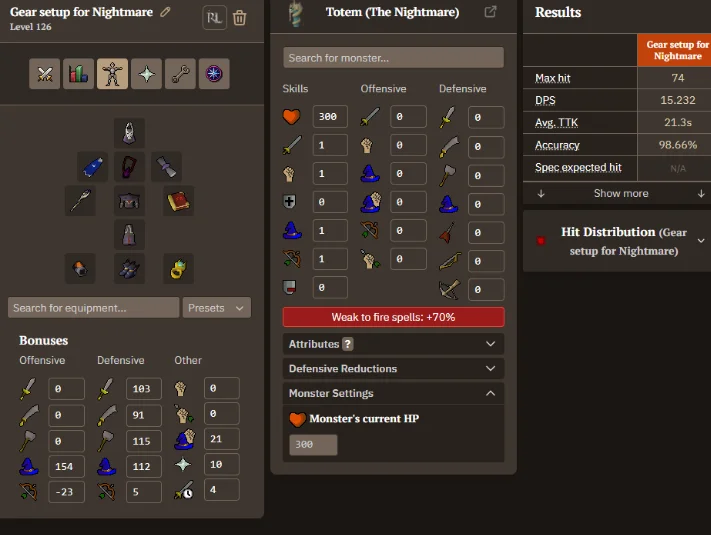
Head slot: Virtus mask
Neck slot: Occult necklace
Cape slot: Imbued God cape
Body slot: Virtus robe top
Leg slot: Virtus robe bottom
Weapon slot: Trident of the swamp
Shield slot: Mage's book
Ammo slot: Rada's blessing 4
Glove slot: Tormented bracelet
Boot slot: Eternal boots
Ring slot: Lightbearer
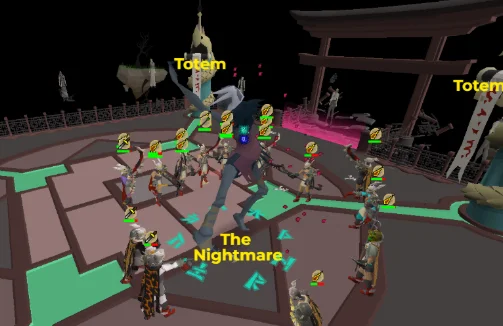
Players can't damage the Nightmare directly until her shield is broken every phase. After her shield is broken, players should attack four totems in each corner of the boss room to charge them. When fully charged, they will unleash a magical blast of energy on the Nightmare, dealing 800 damage to her.
After the first 800 damage from the totem, the Nightmare will enter phase 2. After the second blast of 800 damage, the Nightmare will be in phase 3, also known as the final phase. The Nightmare will die from the 3rd blast in her final phase.
Protection prayers can reduce the damage from some of the Nightmare's attacks, but if incorrectly prayed against, the player will get 120% of her maximum hit for her melee attack. The ranged and magic attacks hit every player in the room, but the melee attack is usually directed at the tank. It's highly recommended to play with game sounds on, as the sounds for each attack are quite different and will help you use the right protection prayer.
Here are the regular attacks from the Nightmare.
The Nightmare will perform her regular and special attacks during each phase, so always look out for both of them.

The Nightmare will spawn a black portal under her and other smaller ones before sticking her claw inside. Standing on any of the portals will result in 50 damage. Move to another tile to avoid damage.
![]()
Nightmare will summon the sleepwalkers towards her In the second and final phases. The number summoned depends on the number of players in the instance, at a maximum of 24. Sleepwalkers possess 10 health and will die instantly upon taking any damage. After this attack, she will charge up a power blast that will damage every player in the room. The more sleepwalkers she absorbs, the more powerful the power blast becomes, capable of dealing over 70 damage to each player.
Quickly kill as many Sleepwalkers as possible to reduce the power blast's damaging power, as it is unavoidable.

The Nightmare can spawn 2 husks around a random player in the arena. The blue, skinny husk uses magic attacks while the green, bigger husk uses ranged attacks and the targeted player would be unable to move till the Husks are killed.
Players should kill the Husks as soon as possible, but it's best to kill magic Husks first. Only one player would be targeted with this attack, and you should help free them quickly.
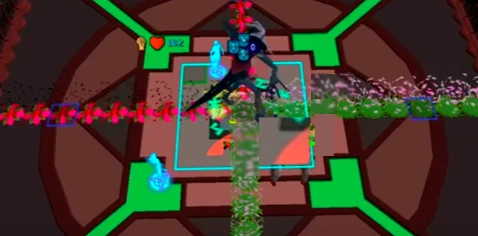
The Nightmare will center herself and divide the room into four equal quadrants. The white nightmare flowers will be safe while the red ones can cause rapid damage, and any attacks that can harm her will heal her. In a short time, the flowers will disappear and players can move freely around the room.
The player's screen will flick pink and protection prayers will change.
This will last until she performs 5 regular attacks.

The Nightmare will throw a parasite at a random player. After 10.8 seconds, it will grow and burst out of the player, dealing huge damage and healing the Nightmare until killed. Drinking a dose of Sanfew potion will reduce the damage and the parasite will emerge from the player to heal the Nightmare. You should kill them as soon as possible before they can do this.
The Nightmare teleports to one of the four edges of the room and swiftly surges to the opposite side, dealing up to 60 damage to anyone in her path.

Puffshroom-like objects will appear in the arena. Players who stand 1 tile within one of them will have their run disabled and their attack speed increased by 1 tick for a short while.
Remember that the Nightmare can't be damaged directly until her shield is broken in every phase. Her shield should be destroyed by attacking her with melee at the start of every phase. Afterward, players must attack the four totems in each corner of the boss room with magic to charge them so they can damage the Nightmare when fully charged. Also, make sure to kill the sleepwalkers summoned at the start of each phase except phase 1 so they don't cause damage to every player in the chamber.
So for each phase, the fight can be summarised as: Melee the Nightmare, charge the totems, kill the Sleepwalkers, and repeat while avoiding the regular and special attacks explained.
The Nightmare will use the following special attacks in this phase: grasping claws, Husks, and Corpse Flowers. Start the fight by attacking the Nightmare with melee. After the shield is depleted, the totems become vulnerable. Fully charge all 4 by attacking them with magic. When fully charged, they will damage the Nightmare for 1/3rd of its health and start phase 2.
This is the hardest phase of the fight. The Nightmare will use the following special attacks in this phase: Grasping claws, Curse, and Parasite special attacks. She will also summon sleepwalkers at the start of this phase. When the parasites emerge from a player, they will priotise the Nightmare if her shield is depleted, launching a projectile at her that restores 31-50 of her shield for every attack they make.
Ensure to kill the parasite after you drink a Sanfew potion. Killing them should be prioritized unless the sleepwalkers are summoned as well.
This phase will also begin with a sleepwalker attack, like the last one. She will use the grasping claws, and 2 new special attacks in this phase: spores and surge. Nightmare will likely use the grasping claws while the spores are still active. When the spores are active, find beforehand which squares you can walk to so that you will dodge a grasping claw portal without triggering any spores.
When the totems are charged in this round, they will damage the Nightmare, and she will finally die.
With the recommended stats above, experienced players can kill the Nightmare 10 times per hour with a 5-man team. This results in a profit of 4M GP per hour after the cost of supplies has been deducted.
![]() 100% drops
100% drops
Big Bones and Bones
![]() Uniques drop
Uniques drop
Nightmare staff (1/300-1/172), Inquisitor's great helm (1/1/240), Inquisitor's hauberk (1/420-1/240), Inquisitor's plateskirt (1/420-1/429), Inquisitor's mace (1/420-1/429), Eldritch orb (1/960-1/549), Harmonised orb (1/960-1/549), Volatile orb (1/960-1/549)
![]() Runes
Runes
Cosmic rune 11-242 (1/25), Nature rune 8-176 (1/25), Death rune 3-176 (1/25), Blood rune 16-440 (1/25), Soul rune 8-132 (1/25), Cannonball 6-220 (1/25), Rune arrow 31-547 (1/33.33)
![]() Resources
Resources
Mithril ore 11-176 (1/25), Coal 15-264 (1/25), Gold ore 9-176 (1/25), Adamantite ore 40-95 (1/25), Magic logs 1-55 (1/25), Grimy cadantine 1-5 (1/25), Grimy torstol 1-5 (1/25), Snapdragon seed 1-7 (1/33.33), Uncut emerald 2-44 (1/33.33), Uncut ruby 27-60 (1/33.33), Runite ore 1-16 (1/50)
![]() Consumables
Consumables
Bass 1-18 (1/16.67), Shark 1-16 (1/16.67), Prayer potion(3) 1-20 (1/20), Sanfew serum(3) 1-20 (1/20), Saradomin brew(3) 1-20 (1/20), Zamorak brew(3) 1-10 (1/20)
![]() Coins 2,291-43,958 (1/50)
Coins 2,291-43,958 (1/50)
![]() Tertiary
Tertiary
Clue scroll (elite) 1 (1/190; 1/200), Little nightmare 1 (1/800-1/4,000), Jar of dreams 1 (1/1,900; 1/2,000)