Death to the Dorgeshuun is the second quest in the Dorgeshuun series. Sigmund is back and trying to destroy the Dorgeshuun again, and it’s up to you to stop him. There’s a fair bit of combat, but it’s still pretty easy if you use the safespot described in this and have 35+ Magic for Fire Bolt.
Difficulty: Medium
Length: Medium
General Questing Tips
- Turn on the RuneLite Quest Helper in your plugin section—it makes things way easier.
- Hold down the spacebar to skip through NPC dialogue and use the number keys to pick chat options quickly.
Quest Completion Time
The Death to the Dorgeshuun took me about 12 minutes. It could take much longer on ironman—up to 30 minutes—depending on how quickly you get the H.A.M. outfit
Item requirements for the Death to the Dorgeshuun
- A light source
- 2 full ham robe sets (7 pieces per set): It includes Ham hood, Ham shirt, Ham robe, Ham boots, Ham gloves, Ham cloak, and Ham logo. If you are an ironman or you plan to obtain these items yourself, Pickpocket the H.A.M guards in their hideouts as they have a good chance of having any of these items. Make sure to first start the quest since it improves your chances of obtaining the robes. You should not obtain the robes in advance. Normal accounts can buy them directly from the Grand Exchange.
- Tinderbox
- Any pickaxe
- Magic or melee combat gear: Sigmund will use protect from ranged prayer. I recommend using magic so you use magic so you can use the safespot below.
Recommendations for the Death to the Dorgeshuun
- 3 Lumbridge teleports
- 1 Games necklace: requires tears of Guthix to teleport to Juna.
Enemies to Defeat
- Sigmund (level 50)
- 3 H.A.M Guards (optional)
Walkthrough for the Death to the Dorgeshuun
Starting the Quest
Bring: a light source
Recommended: Lumbridge teleport
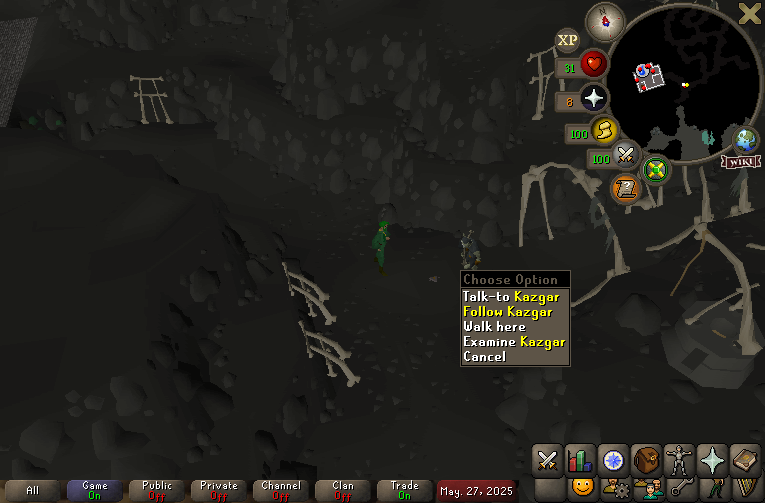
- Teleport to Lumbridge and head down to the kitchen basement. Enter through the hole in the east wall, then right-click Kazgar (shown below) and select “Follow” to fast-travel through the tunnels under Lumbridge Castle.

- Look for Mistag at the entrance of the Dorgeshuun mine, talk to him and pick options 1, 1, then 4 during the dialogue
- After the conversation, right-click Mistag and select “Follow” to fast-travel back to the Lumbridge basement.
Showing Lumbridge to Zanik
Bring a light source and 2 full ham robe sets
- Squeeze back through the hole into the Lumbridge basement, then talk to Zanik in the castle basement and pick option 1—she’ll start following you.
- Head up to the first floor and talk to the Duke, then go downstairs and leave the castle through the front door. A cutscene will start-hold space bar to skip through it..
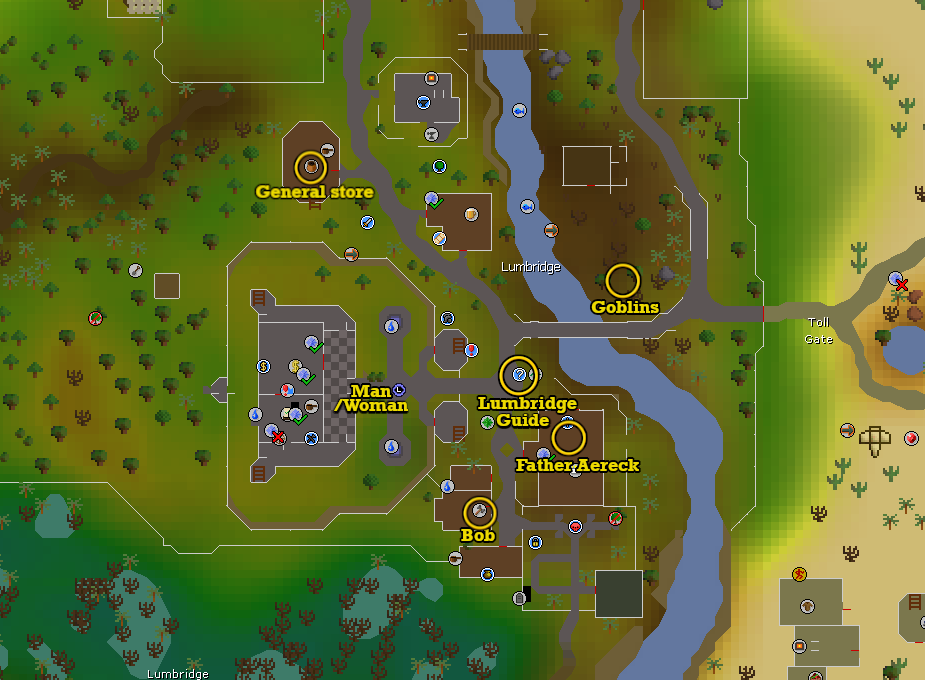
Now you need to chat with the following NPCs while Zanik is following you (all are showed in the image below):

- Man or woman around Lumbridge (right-click and select “talk” so you don’t attack)
- Lumbridge guide
- Talk to Bob in south Lumbrige.
- Talk to father Aereck in the Lumbridge church.
- Approach the Goblins east of the River Lum, and Zanik will start a conversation with your character.
- Talk to the Lumbridge General Store shopkeeper.
- Talk to Zanik about her head sign. Reply 2, 1 for a cutscene to start.
Infiltrating the H.A.M hideout
Bring: A light source and equip a Full ham robe set.
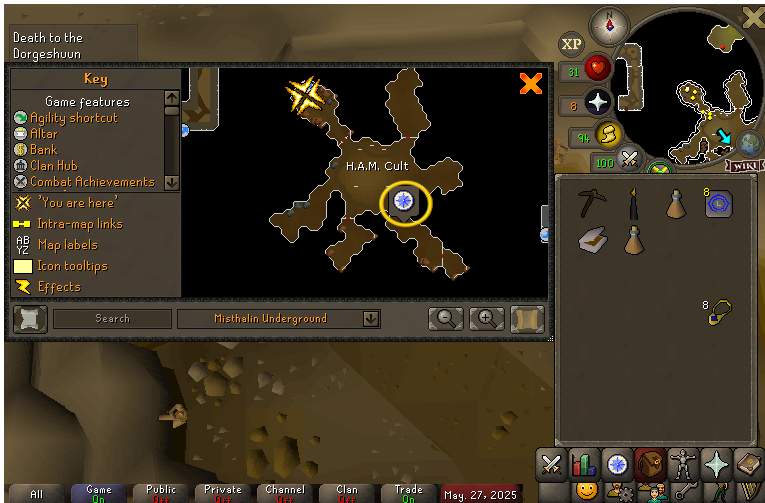
- Pick the lock and head into the H.A.M. lair west of Lumbridge through the trapdoor (shown in the image). Don’t worry if you fail a few times—just keep trying.

- In the hideout, go talk to Johanhus southeast of the base indicated by quest icon below. Reply 4.

- Go stand just south of the stage, like shown below, and wait for Zanik to talk about the speaker—don’t skip the dialogue.
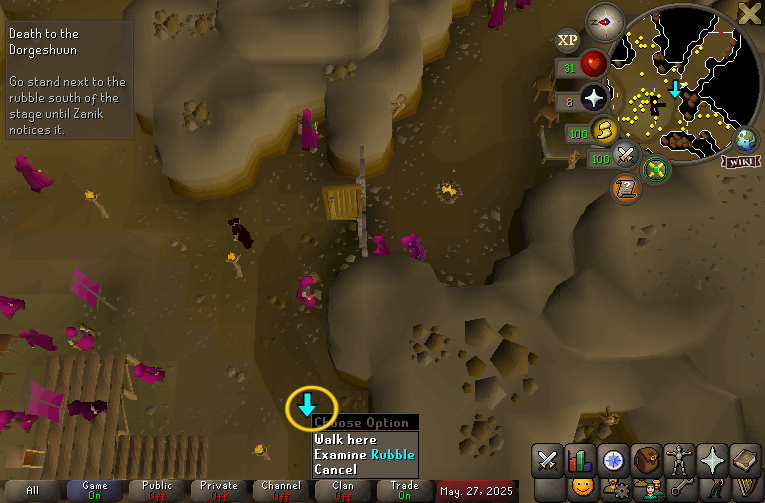
- Then head over to the rubble (shown in the image) south of the stage and wait for Zanik to realize it’s actually a trapdoor.
- Pick the lock on the trapdoor and climb down.

Taking out the H.A.M guards
You’re now in the storeroom. Your job is to distract each guard so Zanik can take them out from behind. If it doesn’t go perfectly, you’ll get jailed—but don’t worry, Zanik will free you. Just don’t interrupt her; if you do, you can pick the lock on the door to escape yourself.
If you get caught, you’ll have to repeat the process, so follow these steps carefully:
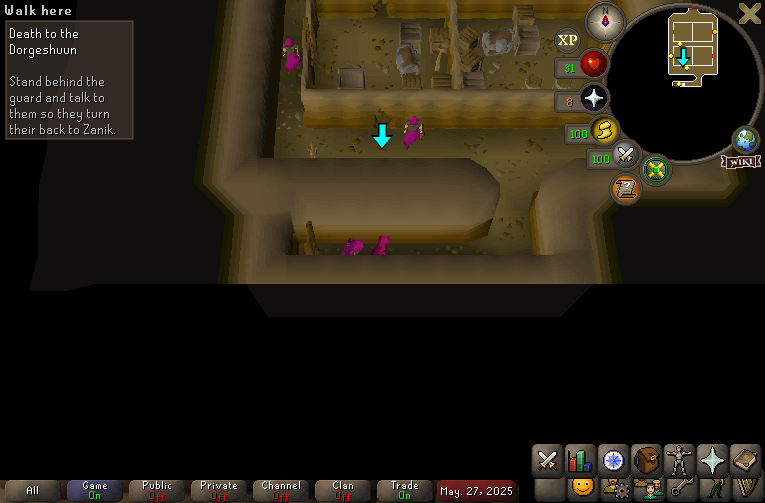
- Stand behind the first guard and talk to him so he turns his back to Zanik. If you’re in the right spot, Zanik will attack and kill him. The exact spot to stand is highlighted below.

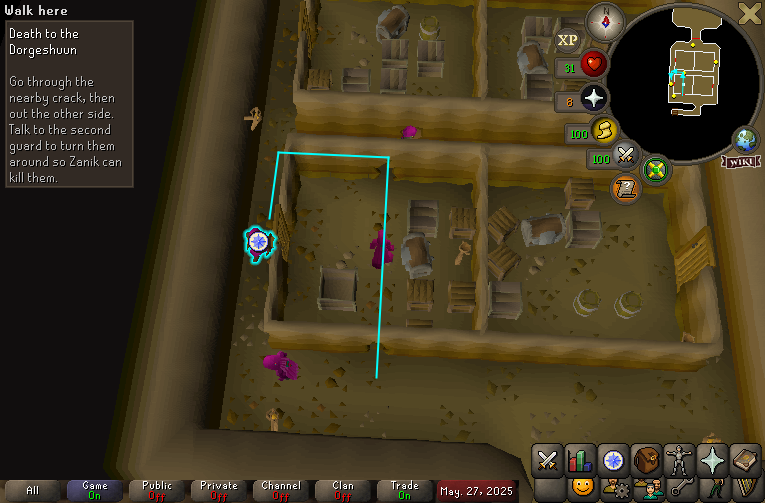
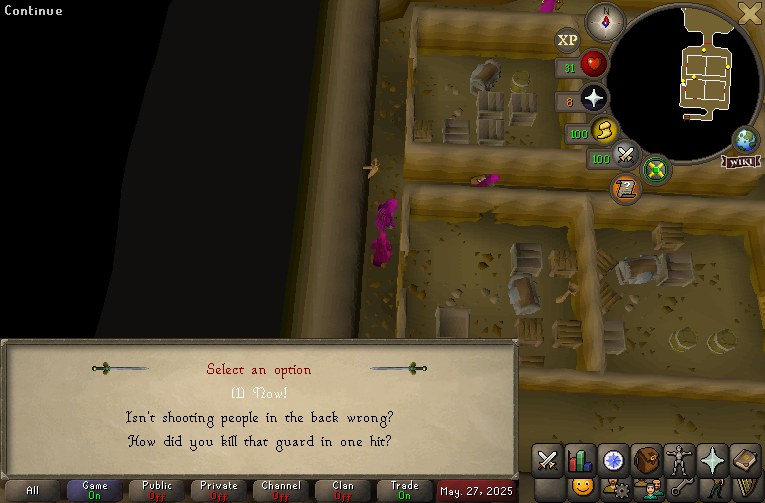
- Go through the nearby crack and come out the other side, following the blue line shown below. Keep an eye on the north guard while doing this. Wait until the north guard walks away (as shown) before squeezing through the second crack. Then talk to the second guard to turn them around so Zanik can take them out.

- Wait till the north guard walks away as shown below, then reply 1 (now!) for Zanik to kill him.

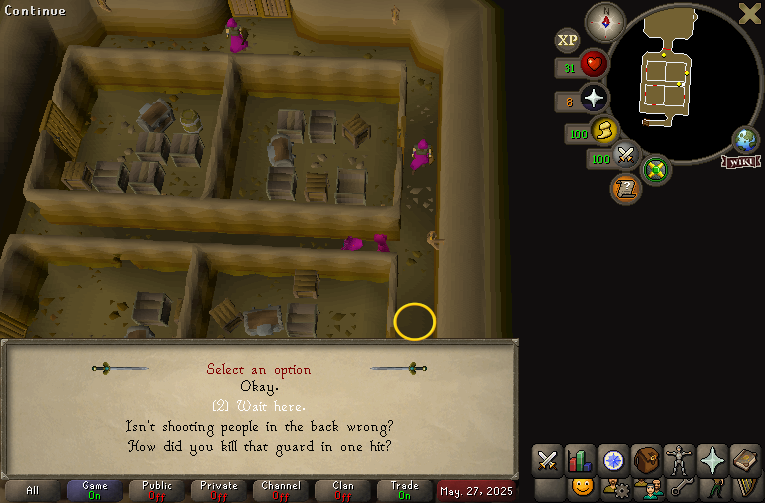
- Stand in the location shown below, then talk to Zanik and tell her to wait there.

- Run south to lure the guard past Zanik and she will take him out from behind
- Stand in the location shown below, just out of sight of the last guard, and talk to Zanik then tell her to wait there.

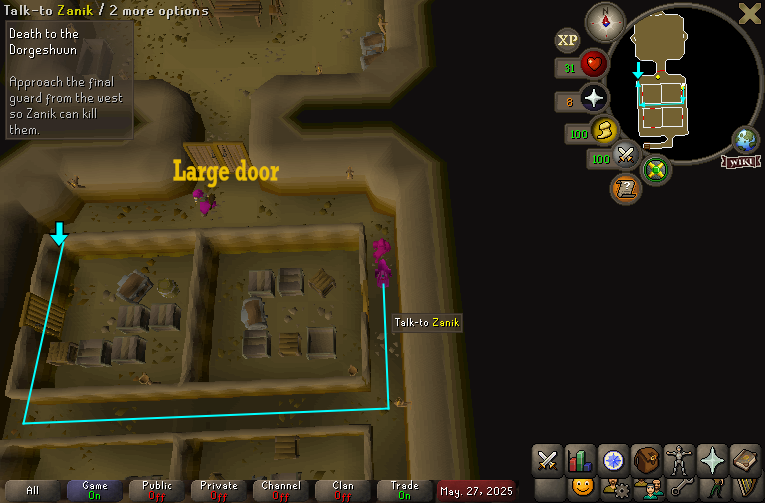
- Head west along the path shown below and stand in the spot above where the final guard can see you. Zanik will take him out when he pays attention to you.
- Stand by the large door shown above to trigger a cutscene—you and Zanik will get caught and thrown out.
- Pick the lock on the cell door to escape, then run northwest and climb the ladder to leave the H.A.M. hideout.
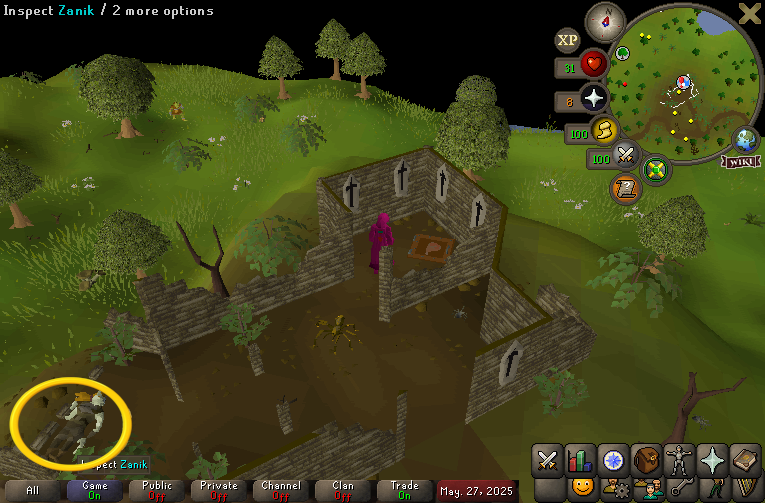
- Inspect Zanik outside the H.A.M. base shown below

Reviving Zanik
Bring: 1 light source, 1 tinderbox, 1 pickaxe (any kind)
- Take Zanik to Juna in the Lumbridge Swamp. If you’ve completed Tears of Guthix, you can teleport there directly using the Games Necklace and skip to the “collecting tears of Guthix section”.. If not, follow the steps below to get there:
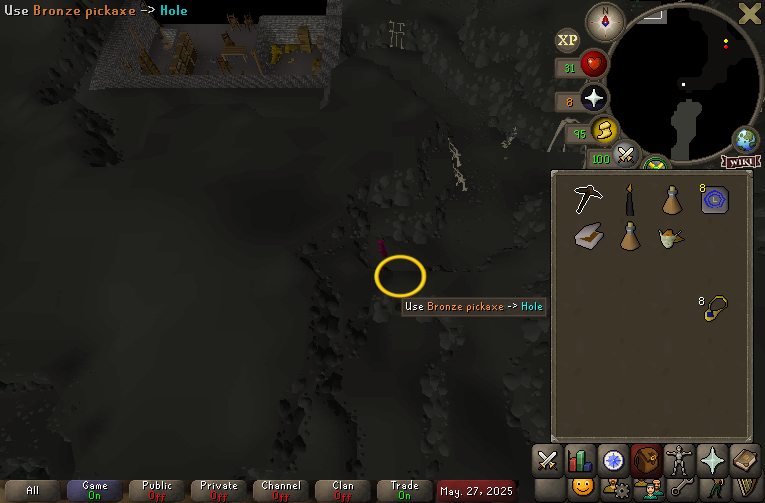
- Head down to the Lumbridge basement, squeeze through the hole on the east side, then run south and use your pickaxe on the hole there as shown below. Once it’s clear, squeeze through it.

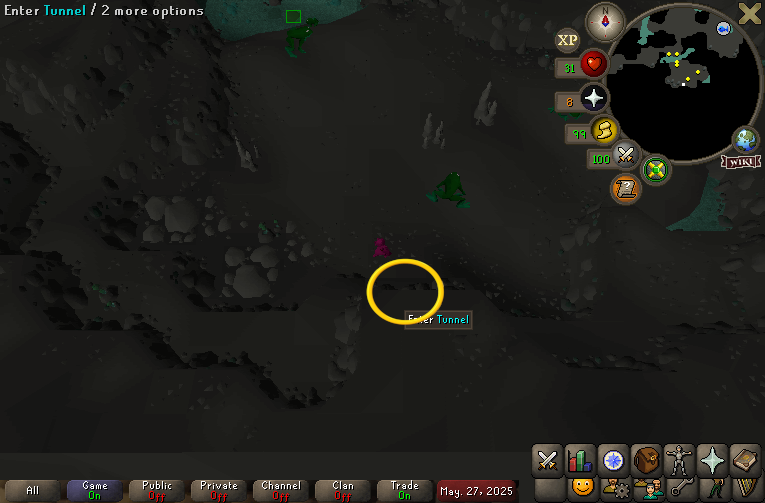
- Keep heading south to enter the tunnel. You’ll need to jump across a small river using the stepping stones. If you miss, your light source will go out, so just relight it with your tinderbox and keep going.

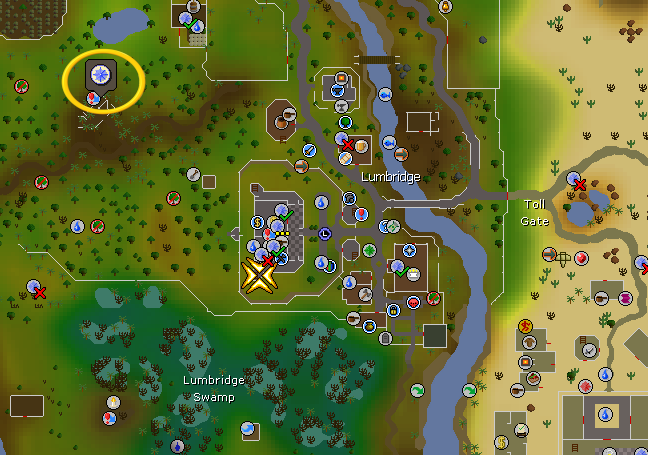
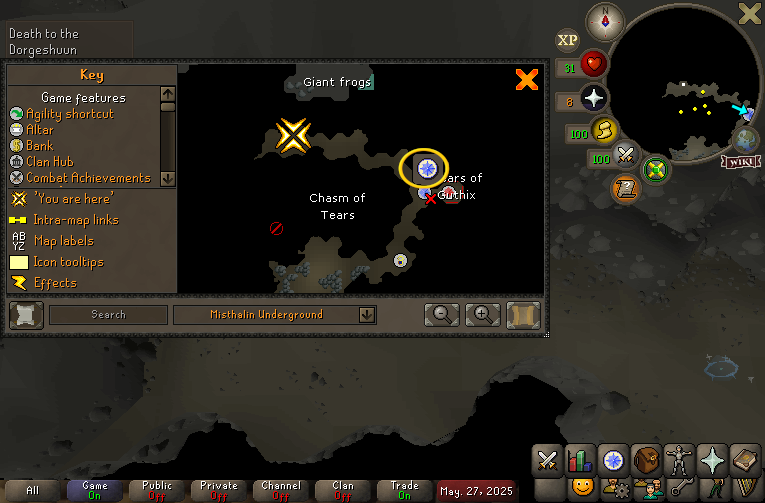
- Keep heading east until you reach Juna, marked by the quest icon in the image below. Pick option 1 when talking to her.

Collect Tears of Guthix
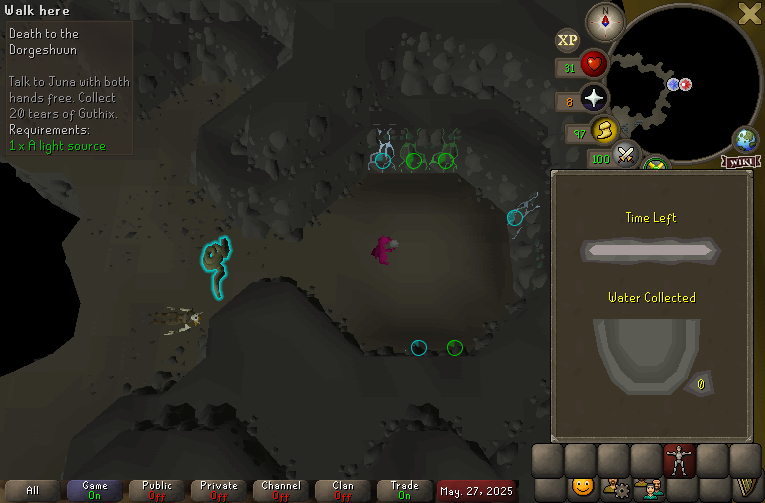
- Alright, Juna will ask you to collect 20 Tears of Guthix to help revive Zanik. Make sure your hand slot is free so you can carry the bowl. Only collect from the blue weeping walls shown below to fill it. After a few seconds, the blue walls will turn green, so you’ll need to move to another one.

- Once you’ve collected all 20 Tears of Guthix, a cutscene will play and Zanik will be revived. After it ends, talk to her to find out what happened.
Foiling H.A.M
Bring: Full H.A.M. robe set (7 pieces, equipped), Magic or melee combat gear (I recommend magic so you can safespot the Sigmund and the guards), and some pieces of food (5+ Lobsters works if you use the safespot below)
- Teleport to Lumbridge and talk to Zanik in the basement. Pick option 1, and she’ll start following you.
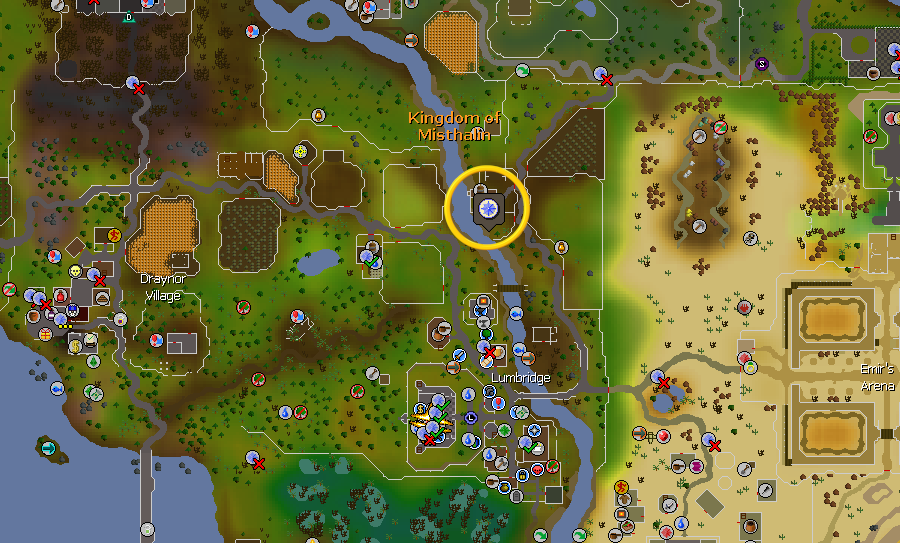
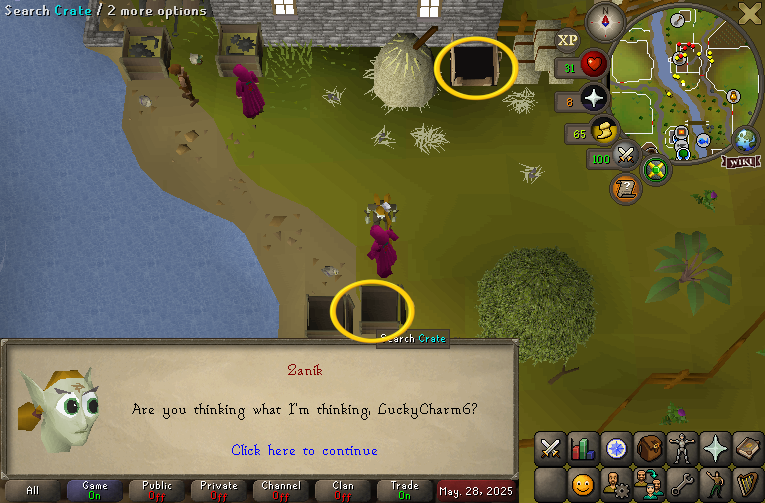
- Next, head to the farm east of Lumbridge indicated by quest icon below and search the crate there—select options 1, then 1. Make sure both your hands are free to pick it up. If Zanik doesn’t show up, use the ‘Call follower’ button (whistle icon) in the Worn Equipment tab to get her.


Fighting Sigmund and his Guards
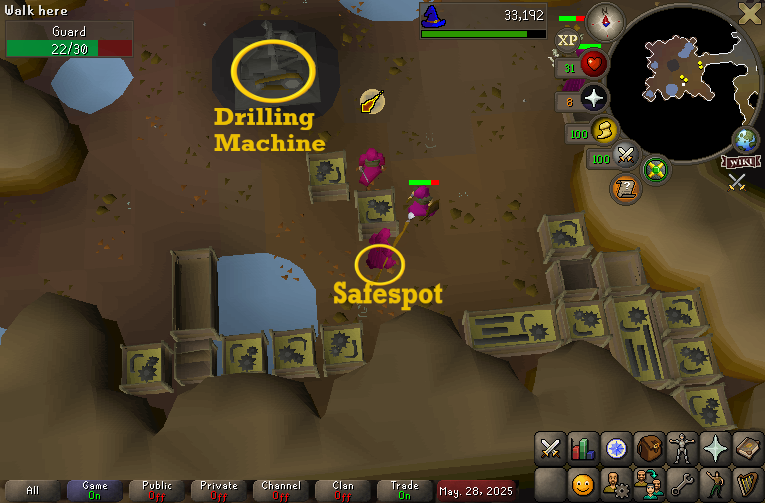
- Head west and use the crate shown below to safespot the guards, just like in the image.

- After taking out the guards, Zanik will attack Sigmund with her crossbow, and he’ll switch to Protect from Ranged. Once he does, switch to melee or ranged to attack him.
- When Sigmund drops to 1 HP, he’ll escape—then your next task is to go destroy the drilling machine.
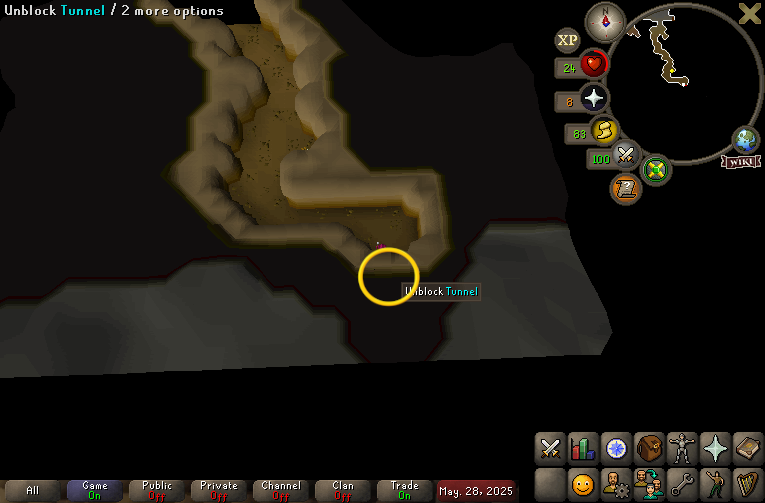
- Leave the area via the exit to the south as shown below to finish the quest.

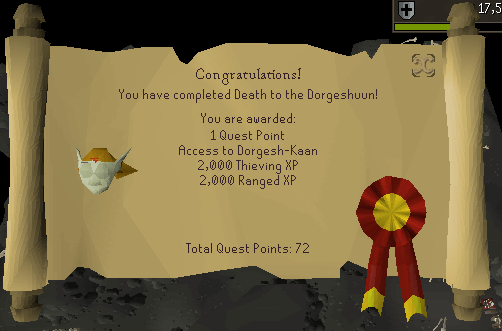
Congratulations! You have completed the Death to the Dorgeshuun.
Rewards from Death to the Dorgeshuun Quest

- 1 Quest Point
- Access to Dorgesh-kan
- 2,000 Thieving XP
- 2,000 ranged XP
- Access to the H.A.M. storeroom, where you can loot gems, jewelry, and coins from chests
- Access to the water wheel tunnel (Dartog will appear here, and you can freely travel between the Lumbridge Castle cellar, Dorgeshuun Mines, and the water wheel tunnel)
- Ability to use the Bone Dagger and Dorgeshuun Crossbow special attacks
- Access to Dorgesh-Kaan, the Dorgeshuun city
- A torch if you didn’t already have a light source in your inventory at the end of the quest
Death to the Dorgeshuun is a fantastic quest that opens up Dorgesh-Kaan and pushes the story forward. To wrap up Sigmund’s storyline and see it through to the end, be sure to follow our Another Slice of H.A.M. guide.
