Magic is one of the most versatile skills in all of OSRS. Want Vengeance? Ice Barrage? Teleports for clue scrolls? Let’s talk about getting you to those levels as quickly as possible - bursting!
1. What is "Bursting"?
If you've spent any time around experienced OSRS players, you've probably heard the term bursting. It refers to training Magic using Ancient Magicks burst or barrage spells against multiple monsters at once.
Because these spells deal damage in a 3x3 area, they can hit up to 9 targets simultaneously. This makes bursting one of the fastest Magic training methods in the game, with experience rates reaching 500,000+ XP per hour under optimal conditions.
Of course, those rates aren't guaranteed. Your XP per hour will depend on several factors, including your gear, Magic level, account build, spell choice, and—most importantly—the location you're bursting in.
Before we dive into the different methods, it's worth covering the requirements and expected costs. Bursting is incredibly effective, but it's also one of the more expensive ways to train Magic. Knowing what you'll need before you start will help you decide whether it's the right training method for your account.
2. What are the requirements to burst in OSRS?
There are 6 types of ‘burst’ spells currently in OSRS.
 Smoke Burst: Level-62
 Shadow Burst: Level-64
 Blood Burst: Level-68
 Ice Burst: Level-70
 Smoke Barrage: Level-86
 Shadow Barrage: Level-88
 Blood Barrage: Level-92
 Ice Barrage: Level-94
Technically, you can begin bursting as soon as you unlock Smoke Burst at level 62 Magic. However, I wouldn't recommend it unless you have a specific reason to do so. At lower Magic levels, the GP spent per XP gained is significantly higher, making it one of the least cost-effective stages of the grind. We'll take a closer look at the costs later in the guide.
To burst efficiently, you'll need a multi-combat area with a large number of aggressive monsters. Since burst and barrage spells can hit up to 9 targets at once, your chosen location should have at least nine monsters available to stack consistently—although more is always better.
I also recommend having at least 43 Prayer for Protect from Melee. This allows you to negate almost all incoming damage, making bursting much more relaxed and significantly extending your trips.
Note: I've built several low-Prayer PK accounts over the years and have developed a few alternative methods for bursting without overhead prayers. I'll cover those later in the guide.
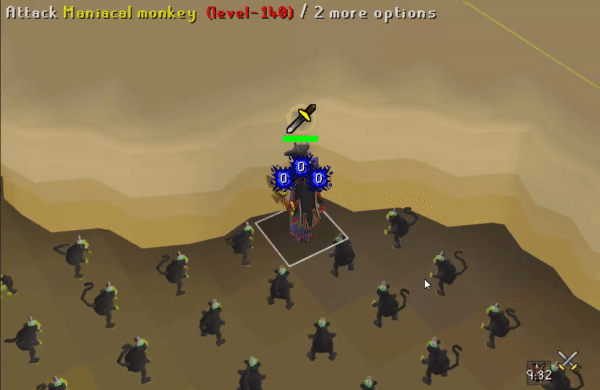
In my experience, the two best places to burst are the monkey tunnels unlocked through Monkey Madness I and Monkey Madness II. These locations are popular for good reason—they're packed with aggressive monkeys that respawn quickly, making it easy to maintain maximum targets and consistently high XP rates.
If you're planning to train Magic all the way to 99, I strongly recommend completing at least Monkey Madness I before you start. Better still, unlocking the Monkey Madness II tunnels is well worth the extra time. Although it requires additional questing and skilling, the increased XP per hour and improved efficiency will more than make up for the investment over the course of your grind.
If you need help completing the required quests or training the necessary skills, you can always check out our services.
If you haven't unlocked either quest yet, don't worry. Later in this guide, I'll cover several alternative bursting locations that offer excellent experience before you gain access to the Monkey Madness tunnels.
3. How much does bursting really cost?
Before committing to bursting as your primary Magic training method, it's worth understanding exactly what the grind will cost. While bursting offers some of the highest Magic XP rates in OSRS, that efficiency comes at a price.
Unlike Ranged, Magic has several viable training methods that offer respectable experience rates at varying costs. Bursting sits firmly at the expensive end of the spectrum, but for many players, the time saved easily justifies the additional GP spent. As most of us have less free time than we used to, maximizing XP per hour is often more valuable than minimizing the cost of training.
The total cost of bursting varies depending on several factors, including your account build, gear setup, bursting location, and the spell you're using. Better equipment increases your damage output, reducing the number of casts required to reach your target level. Likewise, the Monkey Madness II tunnels provide significantly better XP per cast than most other bursting locations, thanks to their high monster density and the ease of maintaining full stacks of monkeys.
If you're using proper stacking techniques—or even better, a pair of alt accounts—you'll be hitting the maximum of 9 targets for almost every cast. This dramatically improves both your XP per hour and your overall cost efficiency.
Although you can begin bursting with Smoke Burst at level 62 Magic, I generally recommend using alternative training methods until level 70. At lower levels, Smoke Burst is relatively slow in terms of exp. Once you unlock Ice Burst, your XP rates increase noticeably, making each cast considerably more efficient and reducing the overall cost of the grind.
For that reason, all of the cost calculations below assume you begin bursting from level 70 using Ice Burst, before upgrading to Ice Barrage at level 94.
The tables below show the average number of casts, rune requirements, GP cost, and expected XP per hour for each account build. These figures are based on extensive testing across both the Monkey Madness I and Monkey Madness II tunnels and should provide a realistic estimate of what to expect on your journey to 99 Magic:
Bursting costs for pures:
Method | Ice Burst | Ice Barrage |
MM1 Tunnels | - 70-94 Magic
- 35,650 casts
- 202.2xp per cast
- 142,600 Water Runes
- 142,600 Chaos Runes
- 71,300 Death Runes
- 222k xp/h average
Total: 29,803,400gp | - 94-99 Magic
- 17,970 casts
- 283.3xp per cast
- 35,940 Blood Runes
- 71,880 Death Runes
- 107,820 Water Runes
- 312k xp/h average
Total: 25,086,120gp |
MM2 Tunnels | - 70-94 Mage
- 28,990 casts
- 248.6xp per cast
- 115,960 Water Runes
- 115,960 Chaos Runes
- 57,980 Death Runes
- 273k xp/h average
Total: 24,235,640gp | - 94-99 Magic
- 14,570 casts
- 349.4xp per cast
- 29,140 Blood Runes
- 58,280 Death Runes
- 87,420 Water Runes
- 384k xp/h average
Total: 20,339,720gp |
Bursting costs for zerkers:
| Method | Ice Burst | Ice Barrage |
MM1 Tunnels | - 70-94 Magic
- 34,650 casts
- 208xp per cast
- 138,600 Water Runes
- 138,600 Chaos Runes
- 69,300 Death Runes
- 228k xp/h average
Total: 28,967,400gp | - 94-99 Magic
- 17,530 casts
- 290.3xp per cast
- 35,060 Blood Runes
- 70,120 Death Runes
- 105,180 Water Runes
- 319k xp/h average
Total: 24,471,880gp |
MM2 Tunnels | - 70-94 Mage
- 28,990 casts
- 248.6xp per cast
- 115,960 Water Runes
- 115,960 Chaos Runes
- 57,980 Death Runes
- 273k xp/h average
Total: 24,235,640gp | - 94-99 Magic
- 14,200 casts
- 358.4xp per cast
- 28,400 Blood Runes
- 56,800 Death Runes
- 85,200 Water Runes
- 394k xp/h average
Total: 19,823,200gp |
Bursting costs for mains:
Method | Ice Burst | Ice Barrage |
MM1 Tunnels | - 70-94 Magic
- 31,065 casts
- 232xp per cast
- 124,260 Water Runes
- 124,260 Chaos Runes
- 62,130 Death Runes
- 255k xp/h average
Total: 25,970,340gp | - 94-99 Magic
- 16,445 casts
- 309.5xp per cast
- 32,890 Blood Runes
- 65,780 Death Runes
- 98,670 Water Runes
- 340.5k xp/h average
Total: 22,957,220gp |
MM2 Tunnels | - 70-94 Mage
- 25,111 casts
- 287xp per cast
- 100,444 Water Runes
- 100,444 Chaos Runes
- 50,222 Death Runes
- 315k xp/h average
Total: 20,992,796gp | - 94-99 Magic
- 12,770 casts
- 398.5xp per cast
- 25,540 Blood Runes
- 51,080 Death Runes
- 76,620 Water Runes
- 438k xp/h average
Total: 17,826,920gp |
Gamer note: I would strongly recommend an imbued heart/saturated heart for this grind. That being said, if you don’t mind using a little extra gold, then for a few extra dollars in value, you can get the grind done much quicker when you buy OSRS gold from us!
Gear Setup For Bursting
Your gear has a noticeable impact on both your XP per hour and the overall cost of bursting. Higher Magic damage bonuses increase your maximum hit, allowing you to kill monsters more quickly and reduce the number of casts needed to reach your target level.
Below are the best-in-slot gear setups for each account build.
Don't worry if you can't afford every item listed. Bursting is still highly effective with budget alternatives, and you can comfortably substitute lower-tier equipment where needed. For example, Dagon'hai is a perfectly viable replacement for Virtus, while a Dragon hunter wand performs well if you don't have access to a Kodai wand.
The stronger your gear, the fewer casts you'll need to reach 99 Magic, so upgrading your equipment over time will improve both your experience rates and your overall efficiency.
If you're missing a few upgrades, don't let that stop you. Start with the best gear you can afford and improve your setup as your bank grows.
Pure Gear Setup (1+ Defence):

- Head slot: Elder Chaos Hood
- Cape slot: Imbued Zamorak Cape
- Necklace slot: Occult Necklace
- Ammo slot: Unholy Blessing
- Weapon slot: Kodai Wand/Dragonhunter Wand
- Body slot: Elder Chaos Top
- Shield slot: Mages’ Book
- Legs slot: Elder Chaos Robe
- Gloves slot: Confliction Gauntlets/Tormented Bracelet
- Boots slot: Holy sandals
- Ring slot: Ring of the gods (i)
Zerker Gear Setup (42+ Defence):

- Head slot: Dagon’hai Hat
- Cape slot: Imbued Zamorak Cape
- Necklace slot: Occult Necklace
- Ammo slot: Unholy Blessing
- Weapon slot: Kodai Wand/Dragonhunter Wand
- Body slot: Dagon’hai Top
- Shield slot: Mages’ Book
- Legs slot: Dagon’hai Bottoms
- Gloves slot: Confliction Gauntlets/Tormented Bracelet
- Boots slot: Holy sandals
- Ring slot: Ring of the gods (i)
Main Gear Setup (75+ Defence):

- .Head slot: Virtus Mask/Dagon’hai Hat
- Cape slot: Imbued Zamorak Cape
- Necklace slot: Occult Necklace
- Ammo slot: Unholy Blessing
- Weapon slot: Kodai Wand/Dragonhunter Wand
- Body slot: Virtus Top
- Shield slot: Elidinis Ward/Mages’ Book
- Legs slot: Virtus Bottoms
- Gloves slot: Confliction Gauntlets/Tormented Bracelet
- Boots slot: Holy sandals
- Ring slot: Ring of the gods (i)
NOTE: A common mistake made by a lot of players is using the salve amulet (ei) to burst in the Monkey Madness I tunnels. Although it does give 20% accuracy and damage, it only gives the damage bonus to the original target, so the other 8 monsters you hit won’t receive the bonus %. Occult will provide more DPS overall than the salve amulet will!
MM1 Caves Inventory Setup:

- 1x Rune pouch (with casts of your spell)
- 1x Saturated/Imbued Heart (not necessary but recommended)
- 2x Marlin (or other food)
- 1x Monkey gree-gree (any type)
- 1x Teleport to house (to leave the caves)
- 1x Ape Atoll teleport (arceuss tablet to ape atoll dungeon)
- 1x Antidote++
- 20x Prayer potions (can use super restores for longer trips)
MM2 Caves Inventory Setup:

- 1x Rune pouch (with cats of your spell)
- 1x Saturated/Imbued Heart (not necessary but recommended)
- 2x Marlin (or other food)
- 3x Extended stamina potions (only if not using alts to stack)
- 1x Bullseye lantern (or other light source)
- 1x Teleport to house (or any method to get you to ape atoll/glider)
- 19x Prayer potions (can use super restores for longer trips)
5. Show me how to burst!
Now that you've got your gear, runes, and inventory prepared, it's time to put everything into practice.
We'll start with the Monkey Madness I tunnels, as they're available much earlier in your account progression. After that, we'll move on to the Monkey Madness II tunnels, which offer some of the highest Magic XP rates in the game and are the preferred choice for players training to 99.
Method 1: Monkey Madness I Tunnels (220K-320K exp/h depending on stats/gear)
The Monkey Madness I tunnels are the earliest high-efficiency bursting location available in OSRS. While they don't quite match the experience rates of the MM2 tunnels, they're still an excellent option for training Magic before unlocking the sequel.
To use this method, you'll need access to Ape Atoll. I recommend completing the quest—or at least progressing far enough to obtain a Monkey Gree-gree—so you can travel through the island without constantly being attacked. For this guide, I'll assume you've completed the quest.
Use your Ape Atoll Teleport to reach the dungeon, then follow the route shown below to the bursting spot:


Once you arrive, stand on the tile shown above and the monkeys will aggro you. At the beginning of each trip, your XP rates will be slightly lower because there won't be enough monkeys to maintain the maximum stack of 9 targets.
As the cave periodically shakes, monkey bones scattered around the floor will revive into new monkeys. However, each tile can only revive one bone per shake, so after a few minutes you'll start seeing fewer targets.
To maintain the best possible XP rates, pick up spare monkey bones and place them on unused tiles around your bursting area. This creates additional spawn locations, allowing more monkeys to revive and making it much easier to consistently hit the maximum number of targets.
The GIF below demonstrates how to reposition the bones for better spawn coverage.
Like most aggressive monsters in OSRS, the monkeys will stop attacking after roughly 10 minutes.
To reset their aggression, run east through either tunnel until you reach the next cave, then return to your bursting spot. This will refresh the monkeys' aggression and allow them to continue stacking around you.
If you're using RuneLite, I highly recommend enabling the NPC Aggression Timer plugin.

If you use this, you can also use the below option to see area lines of aggression:

Once the timer on your screen reaches zero, simply cross one of the yellow lines before returning to your bursting tile. The GIF below shows this process.


From here, the method is straightforward. Keep your Protect from Melee active, cast your spells, and enjoy some of the fastest Magic experience available before unlocking Monkey Madness II.
Method 2: Monkey Madness II Tunnels (270K-440K exp/h depending on stats/gear)
If your goal is to reach 99 Magic as quickly and efficiently as possible, the Monkey Madness II tunnels are the best bursting location in OSRS.
Compared to the MM1 tunnels, you'll benefit from higher XP per hour, better XP per cast, and a much more consistent bursting experience.
If you haven't completed Monkey Madness II yet, I'd strongly recommend doing so before committing to a long Magic grind. The time spent unlocking the tunnels will easily pay for itself over the course of training to 99.
Now you’re ready to go, grab the inventory setup above (don’t forget light source), then travel to any Gnome Glider.
My preferred route is to teleport to my POH, restore stats at the rejuvenation pool, teleport to the Duel Arena, and run west to the glider. It's a quick and convenient route, but any glider will work.
At the glider, select the destination shown below.

After arriving, head south and enter the dungeon entrance.
It can be easy to miss the entrance the first time, so I've included another image below showing its exact location.

The route through the tunnels is unique to each account and is determined during the Monkey Madness II quest. Once unlocked, your correct path never changes.
Follow the route shown below. If you choose the wrong obstacle, you'll receive a chatbox message telling you that you've gone the wrong way. Simply retrace your steps to the previous obstacle, choose a different route, and continue. Fortunately, there are only a handful of obstacles before reaching the bursting area.

Once you reach the final hole, climb down and follow the eastern path to the bursting spot shown below:

There are two options here:
Option 1) 2 Alts required. Stand on the marked tile with Auto Retaliate enabled while two alt accounts stand directly south of your character, following one another. This causes the monkeys to stack automatically, allowing you to continuously hit the maximum number of targets without any manual movement.
Both alt accounts must have completed Monkey Madness II and should keep Protect from Melee active until the monkeys lose aggression. Bringing a few Prayer potions and some food for the alts is recommended.
The GIF below demonstrates the dancing alts:

Option 2) No alts required. If you don't have access to alt accounts, you can still achieve excellent XP rates by manually stacking the monkeys.
Stand on the same bursting tile, then move back and forth between the two tiles shown below. This movement naturally groups the monkeys together, allowing you to maintain efficient stacks throughout your trip.
Approximately every 10 minutes, the monkeys will become unaggressive.
To reset them, run west through the tunnel until you reach the rope area, then return to your bursting spot.
If you're using RuneLite, I highly recommend enabling the NPC Aggression Timer plugin. It displays a countdown until aggression expires, along with yellow boundary lines showing the aggression zones.


When the timer reaches zero, simply cross one of the yellow lines before returning to your bursting tile.

Now just drink your prayer pots, cast your spells and watch the exp rise!
6. Secret Bursting Spot With Little To No Requirements
If you haven’t completed Monkey Madness I or II and would still like to burst - there are a few options that you can still utilize with very little (or even zero) requirements.
In my experience, if you’re trying to build an overall well rounded account, it can be very beneficial to burst your way while training slayer at the same time.
Note: I should mention that because of how early most people now complete MM1 in their account progression, people generally don’t use these methods in 2026. I would definitely suggest doing MM1/MM2 before bursting, or using the slayer route. But if you absolutely just want to burst and really don’t want to do any further questing, you can check out either of the two methods below:
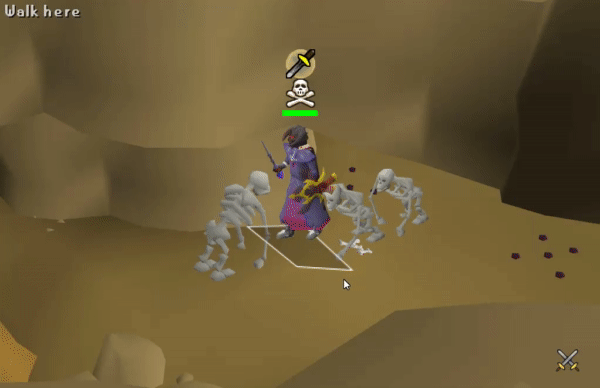
Temple spiders
Requirements: None.
This method is very simple, so I’ll keep it short and to the point! Firstly, let’s talk about getting your inventory. It will look almost identical to the earlier inventories:

And your gear will be your best gear setup available from the ones listed earlier.
Next, let’s talk about getting there. Travel to Zeah using whichever method you prefer and head to Hosidious. From there you are going to use the entrance here:

Once inside run directly south to the centre of the spider room. Then stack the spiders by running between two tiles north and south, shown in the gif below:
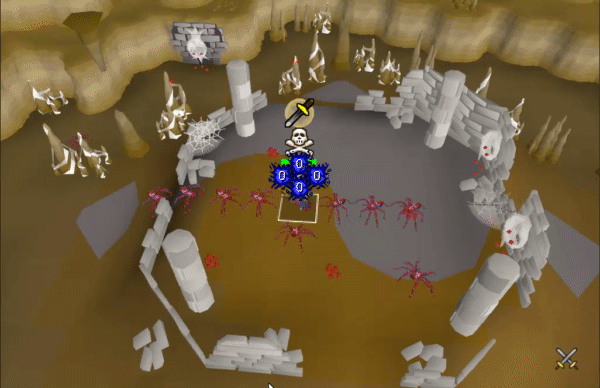
Then cast your barrages and repeat - it truly is that simple. Whenever the spiders lose aggression, you can simply run back to the same ladder you came down and then back to the spot.
Bonus: You can collect some red spider eggs on the way, and help regenerate a small amount of the cost too!
Bandit Bursting at Bandit Camp
Once again, I don’t want to type too much about this method - because it truly is as simple as a few steps!
Firstly, your inventory will look identical to the temple spiders:

Your gear will also be identical, but MAKE SURE you wear either a holy or unholy blessing in your ammo slot. This will keep the bandits aggressive permanently.
 /
/ 
You have many options of how to get there, these include:
Fairy ring to code “BIQ” then run south
Pharaohs Sceptre to “Jaldraocht” and run north-west
Camulet teleport then run north
Shantay pass gate → Carpet to Bedabin camp → Run south
Here’s a map with the numbered options and each path to follow:

Once you’re in the pub at the camp, it follows the same method as the above for the temple spiders. Simply stand in the centre of the pub, run north/south between to tiles as shown in the gif below:
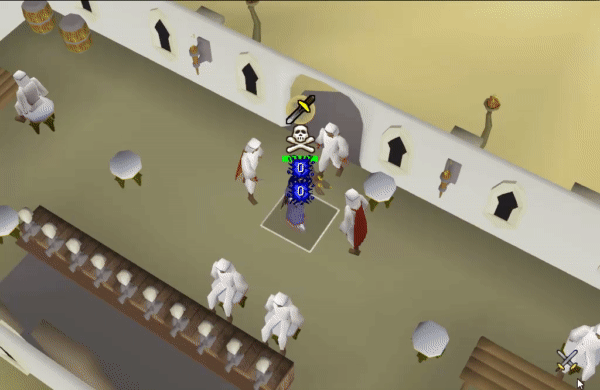
Then cast your spells & repeat. Enjoy the experience!
Note: There is no need to reset aggression here, because with the zamorak/saradomin based blessings, the bandits stay aggressive forever.
That should cover absolutely everything you will ever need to know about bursting! Remember, we’re always here to help with anything you need. Just open up a chat window and we’ll be happy to assist you with anything you ever need.
Happy casting!


.webp)