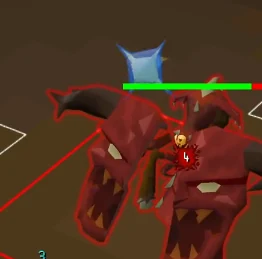
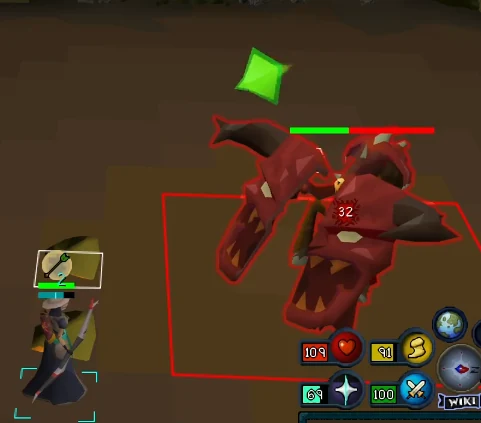
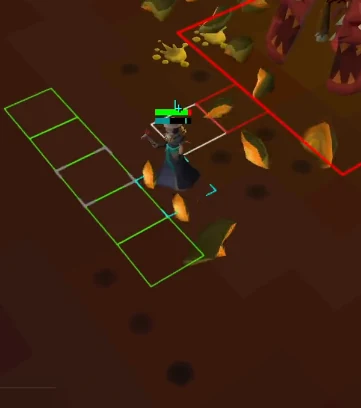
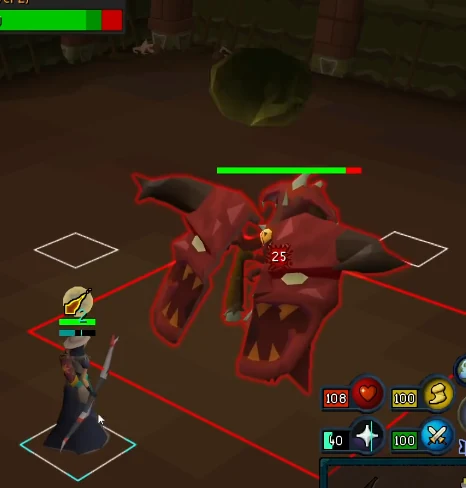
Introduction to the best content in the game (not biased 😇).
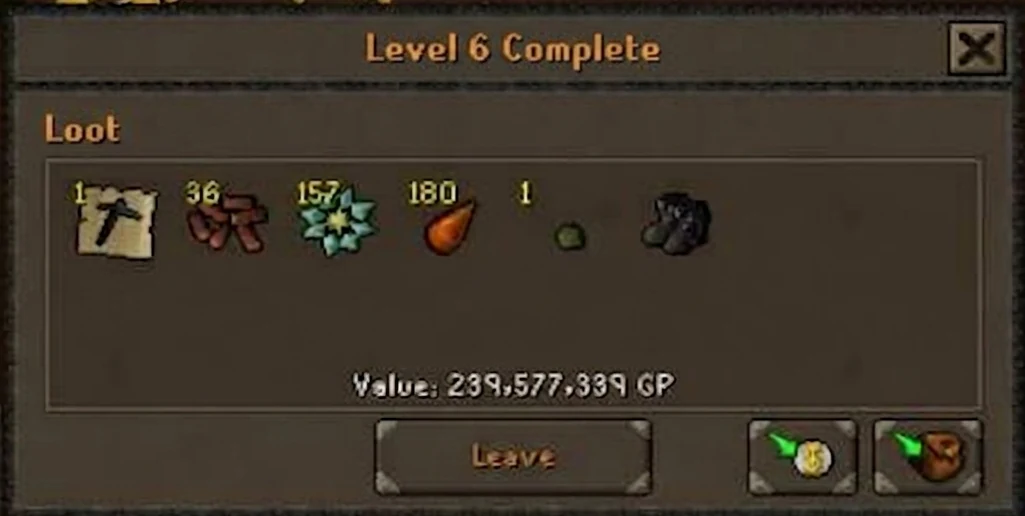
This boss is an incredible amount of gp/hour when you get the hang of it, and chasing golds is insanely addictive, so it low-key saddens me when people give up before mastering it. Don't give up. There's a lot of stuff guides don't seem to quite go over, so I'd like to cover as much of it as I can along with formatting to show the most important parts. ( Delve 1-8 has 11,978,000gp p/h and 1-16 has 15,969,000gp p/h)
You can take as much time as you want between Delves after Doom is defeated (as long as you don't hit the 30-minute AFK timer or get 6 hour logged). Potions/buffs timers will not pause, and you cannot regen spec. You will regen prayer from prayer regen potions, regen run energy and regen hitpoints.
Doom consists of wave-based boss fights that incrementally increase in difficulty the deeper you go; clearing Doom at Delve 1 and Doom at Delve 2 will be slightly tougher with more mechanics, damage, health and attack speed, etc.
Once you reach 8 and beyond, these are called Deep Delves, and it's also when the highscores for Doom will start counting your kill count. So clearing a 1-8 Delve will award you with 1 kc. Each Delve beyond 8 will also reward you with 1 kc, as long as you defeat Doom in that Delve.
At the beginning, Doom of Mokhaiotl can be complicated and overwhelming, but once understood, it is honestly very straightforward, one of the most enjoyable pieces of content and offers superb rewards with good drop rates in deep delves.
You are capable of defeating this boss, regardless of how experienced you are at the game, as long as you have a Scorching Bow and Void; all it requires is a bunch of time and persistence.
My advice is that if you're learning Doom, just skim this guide for now and get a general idea of how the boss works for yourself by sending a few attempts, then come back to read about what you might be confused about.
The way this boss is designed is that it slowly introduces all of these mechanics as you delve deeper, rather than throwing you off the deep end and letting you deal with everything at once, so don't stress.
Realistically, all that's required for clearing delves comfortably is a Scorching Bow and full Void (optimally Elite but not required) alongside a Melee & Magic Demonbane weapon. Otherwise, bring a Twisted Bow if you have one, but remember to still bring a Scorching Bow to deal with the green ranged grubs.
Double Death Charge is incredibly useful here, so go send the worst boss in Gielinor to obtain it, Yama. ugh. Normal Death Charge is also fine but not optimal.
Thralls are not recommended as they cause a lot more poison to appear for a very low amount of damage; however, Death Charge allows you to spec to do Damage, Heal hitpoints or Recover prayer, all of which are very important.
Equipment
Masori is better for earlier delves (1-5), Void is better for deeper delves (6+). As you get closer to deep delves, Masori slowly loses its effectiveness, as you'll mostly be dealing damage during the car phase where your attacks on doom will hit with 100% accuracy. Bring your best ranged gear.
Rings
Lightbearer combined with a spec weapon that heals hp/prayer isn't a must, but it is recommended. You can still clear 1-16 without a lightbearer.
Venator ring adds +2 max hits in full bis void/masori + seeking dragon arrows, but you sacrifice the double spec regen of a lightbearer, so only do it if you're confident.
Melee Punish
Essentially, with the Melee Punish you want to focus on a weapon that has a good amount of strength bonus, as this is what the guaranteed echo damage will roll from; Piety will not affect the echo damage.
Noxious Halberd (Slash/Strength style) or Scythe (Crush/Strength style) are both excellent choices; however, Scythe will cause many more poison splats to appear on the ground since it does 3-hit splats, which sends 3 poison. Noxious Halberd only does 1 hit splat, which sends 1 poison and also lets you attack from a tile away, preventing you from being melee'd by Doom if you space out.
Crystal Halberd (Slash/Aggressive style) is also a decent choice, but you'll mostly be speccing with it (30% Special Attack Energy), so make sure you save some spec energy for the melee punish; it is, however, capable of dealing a ridiculous amount of damage per spec on a melee punish. A normal smack with the crystal halberd is generally fine, but it has an incredibly slow attack speed and won't do much damage compared to a spec.
Dual Macuahuitl also works well here, but the 2-hit split will cause more poison to appear.
You can also just hit it with any melee weapon.
Special Attacks
Ancient Godsword helps an immense amount, allowing you to heal 25 Hitpoints with 50% Special Attack Energy — if you don't have an Ancient Godsword, you can use the blowpipe spec even during shield phase to recover some HP. Not required, but recommended.
Eldritch Nightmare Staff also helps an immense amount with prayer, allowing you to recover 0-25 Prayer Points with 55% Special Attack Energy. Combined with prayer regeneration pots, you effectively don't have to flick your prayers to conserve points. Often you'd spec either the Volatile Earth to recover the maximum amount (25 prayer) or gamble on a good spec on doom during shield phase (0-25 prayer, will still function even though you hit a 0, similar to the Ancient Godsword). Not required and only recommended if you can clear deep delves with ease.
Zaryte Crossbow with Ruby Bolts (e) costs 75% Special Attack Energy to fire a bolt with a 100% chance of activating its effect, which in this case is Ruby Bolts (e), dealing 110 damage if you land the accuracy roll. Not required, but it is recommended if you want to clear delves a little faster. However, it's usually better to keep your specs for health or prayer recovery. You do not need Ruby Dragon Bolts (e), as those are mainly used if you're camping standard ZCB attacks; Ruby Bolts (e) will accomplish the same thing at a margin of the cost. Don't need a Twisted Buckler; just bring the ZCB on its own.
Blowpipe spec is optimally used during Car Phase when you have 100% accuracy, but its healing capability will still work during Shield Phase even though it'll always hit a 0; it still rolls the damage number in the background and heals you accordingly.
Dragon Knives spec can also dish out some serious damage during Car Phase, but I'd still recommend any of the 4 options above this one as you can deal plenty enough damage during Car Phase with a Scorching Bow/Twisted Bow.
Dragon Claws — Nope. Four hit splats = lots of poison. Don't even bother using this.
Inventory Setups
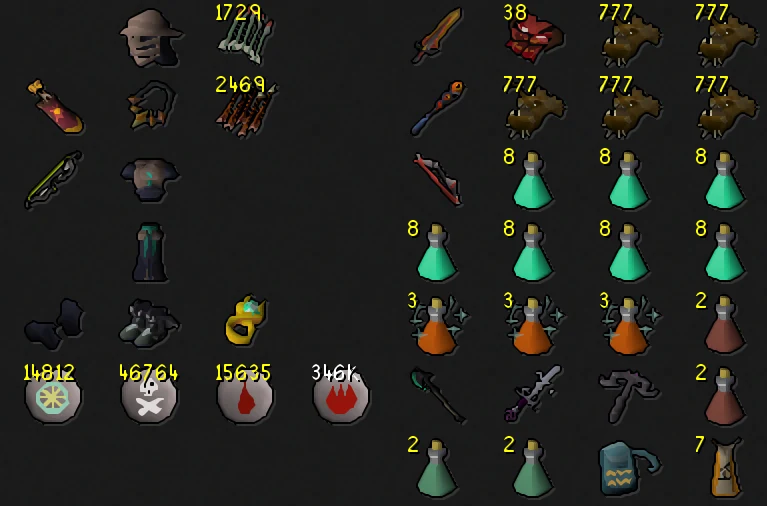
Here's what I recommend when you're relatively comfy with Delves 1-16 with some room for mistakes. This'll usually last you till about Delve 35. If you don't have a quiver, you'll have to bring a bolt switch if you have ZCB.
Setup — Comfy 1-16 (Standard)
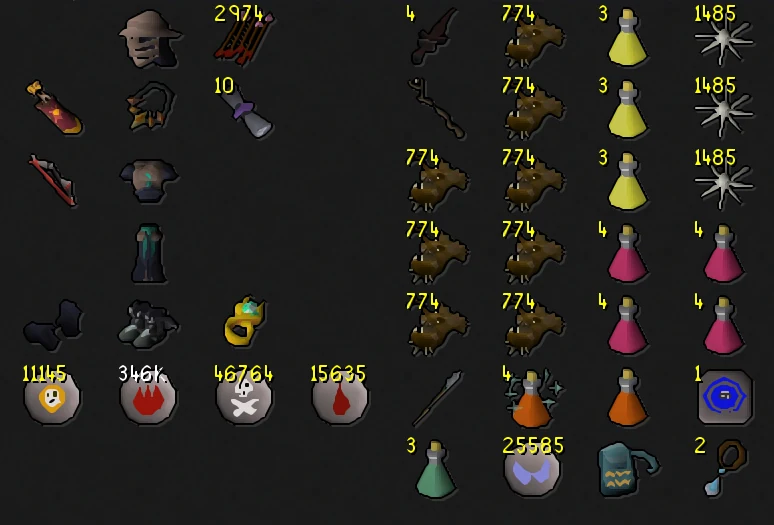
Setup — Budget Friendly
If you're not loaded/don't have much gear, this is a more budget friendly option. Replace quiver with Ava's assembler/attractor or whatever and ditch the blessing so you have space for your arrows. Triple eats (eating angler -> brew -> karambwan) is a really nice way to recover 56 HP in one tick since you can click all three consecutively. You can set up your triple eats like a 3-way switch or whatever way makes it easy for you.
I recommend just grabbing either of these setups and just adjusting, adding/removing depending on how well you do/depending on what you need. Obviously adjust for rupture -> anguish -> fury etc.
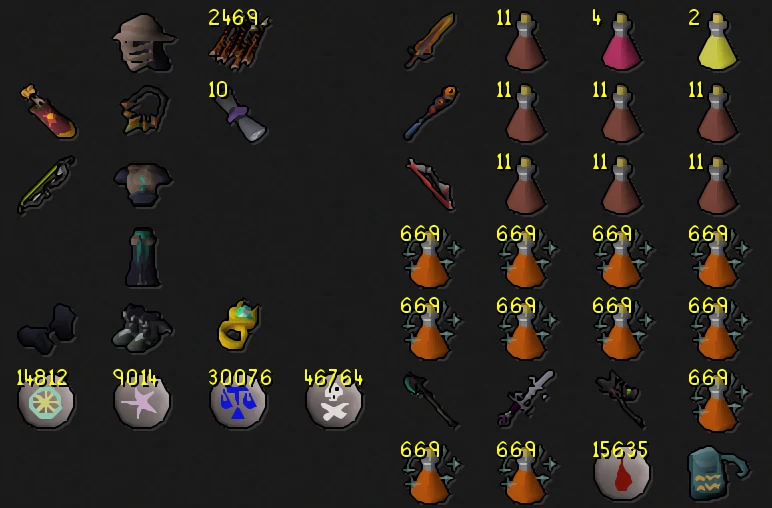
Setup — 100+ Delves (Full Send)
This is currently my setup, capable of 100+ delves utilising everything, including lunar spells for cure me & spellbook swap to Arceuus for death charge. I even have my cosmetic brew just in case, but optimally, instead of a super restore & brew would be some mix more of divine bastions/prayer regeneration potions.
Sanfews aren't recommended because you sometimes click the HP cure poison orb and the game will drink a sanfew instead of casting cure me, which can be frustrating.
Full optimisation would be an inventory of divine bastions and complete reliance on ancient godsword for heals and eldritch for prayer, so you'd have to flick and conserve your prayer points well whilst avoiding as many mechanics as possible.
Mechanics
Basic Attacks
a. Melee (Red) — Pray Melee
b. Magic (Blue) — Pray Magic
c. Ranged (Green) — Pray Ranged
In deeper Delves, Doom's attacks will be more frequent and will appear from the rocks that Doom can throw. The damage of the attack is calculated on the tick that the projectile hits your body. Not from Doom's attack animation or the appearance of the attack. This means the time to flick your prayer on would be the same tick that the projectile itself hits you.
Rock Throw
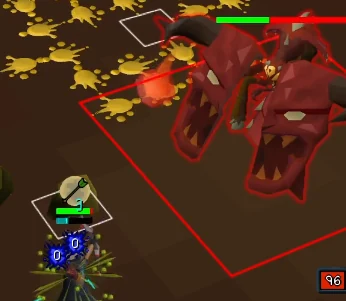
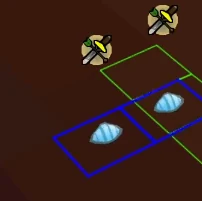
Doom will toss a Rock that'll split into multiple projectiles; shadowed tiles will appear where the fragmented rocks will land, and they will create a static 1-tile area that will prevent you from moving through it and will also absorb one of Doom's slams during Car Phase, which can cause it to break and disappear. Avoid the fragmented tiles (will deal damage to you) and especially make sure you move, as the original targeted spot will spawn a rock on you (stuns you and damages you for a bit) and potentially cause you to miss prayers and take heavy damage.
As you delve deeper, Doom's Rock attacks will increase in quantity, so in Delve 1, the rock will only fire 1 attack. In Delve 8, it'll fire 3 attacks, etc.
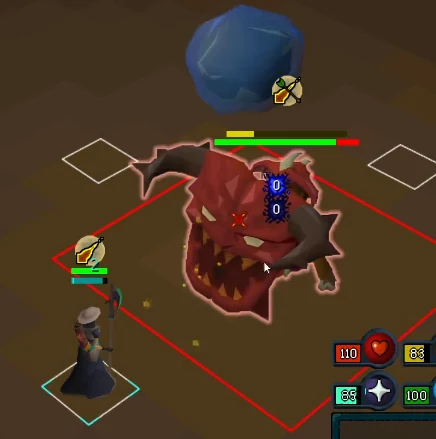
A Green rock means the attacks will be.. Ranged → Magic → Ranged
A Blue rock means the attacks will be.. Magic → Ranged → Magic
KEEP IN MIND that the fragments of the rocks WILL ALWAYS BE GREEN even if the original rock thrown was blue, so do not trust this and remember what colour the rock was before it breaks.
If you're unsure what colour the rock was and you're not confident changing prayers accurately and quickly, stick to a single prayer and eat like crazy.
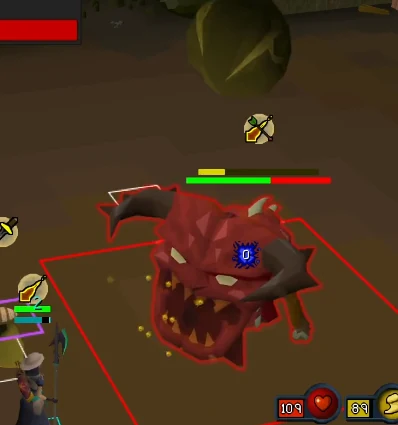
In Delve 8 and beyond, he will begin to throw two rocks instead of one. The best way to handle this is to move to a safe tile when the first rock breaks, as the second rock is about to break, move to a shadowed tile (not your original starting tile, as this will spawn a rock and knock you back) and focus on prayers.
Doom does a Double Rock Throw; when the second rock breaks, it will begin a barrage of 6 attacks. Both rocks will either be Green or Blue; they cannot be separate colours.
A Double Green rock means the attacks will be.. Ranged → Magic → Ranged → Ranged → Magic → Ranged
A Double Blue rock means the attacks will be.. Magic → Ranged → Magic → Magic → Ranged → Magic
If Doom fires a standard attack at you, you don't need to worry about its attack style; it'll always match the rocks' attacks, so as long as you pray against the double rocks you'll be fine.
Double Rock Shadow Tile Example
Step-by-step for handling the Delve 8+ double rock throw safely:
Upon a rock throw, this can lead into a Melee Punish as explained below.
Melee Punish aka Charging Attack (not to be confused with Shield Phase)
Upon tossing a rock, Doom has a chance to begin charging their cannon, and a blue bar will appear above its head during this moment. You should be ready to switch to your Melee Punish Weapon after a rock throw. Make sure Doom has overhead prayers on; otherwise, it's not a Melee Punish but is actually Doom phasing into Shield Phase.
You must hit Doom with your melee attack weapon, e.g. Noxious Halberd and break him out of his charge. If he fully charges, Delve 6 and beyond, Doom can deal 99 Damage with a charged cannon, so be sure to overheal beyond 99 HP to survive the attack if you don't think you'll make the punish in time.
Upon a successful melee punish, you'll do a 100% accurate hit and also do Echo Damage, which deals a fraction of your total strength bonus as an extra hit.(Exactly ⌊1/5 × strength bonus⌋, unaffected by prayers and by Void)
If there's no melee punish, just follow Double Rock Shadow Tile tech as you reach the second rock drop tile.
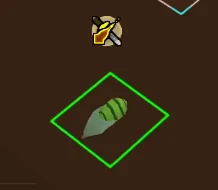
Larvae Grubs
Doom will spawn Grubs behind you before Shield Phase, and once Doom is in Shield Phase, it'll begin spawning grubs in a random, almost 4x4 relaxed area a few tiles away from itself but not too far from you. Position yourself close to where the grubs interact with Doom.
Grubs have 2 HP, which can be hit with standard attacks as long as you use the same attack style, e.g. Melee against the red Melee grub; however, Demonbane weaponry will always one-shot these grubs (unless T H I C C grubs at Delve 8 and beyond, you can attack them with 1 tick attack speed and you must hit them twice). Multi-hit weapons and Eye of Ayak also one-shot them (grubs have 2 HP, standard hits deal 1).
Doom only spawns GIANT grubs (known from now on as T H I C C grubs) at Delve 8 and beyond. Doom WILL NOT spawn a T H I C C Melee Grub; however, it WILL spawn T H I C C Magic & Ranged grubs.
a. Melee — Use Darklight or Emberlight
b. Magic — Use Eye of Ayak (even though Ayak isn't considered a Demonbane weapon, it still works on magic grubs and you'll recover a small amount of Ayak charges for every doom that you slay) or Demonbane Spells (use the lowest tier of Demonbane spells to save gp on runes; they all do the same damage to grubs) via Slayer Staff/Purging Staff etc.
c. Ranged — Use Scorching Bow
In Delve 8 and beyond, Doom will also begin to spawn T H I C C grubs that'll take two shots from a Demonbane or four shots of a standard weapon. (They also carry triple the absorption penalty if Doom eats one.) Your attacks will be 1-tick attack speed with Demonbane weaponry, so use the listed Demonbane weapons above and make sure you hit it twice.
You should also destroy the grubs when they get close to Doom. Outside of shield phase, it'll deal a small amount of damage to Doom as they explode in a 3x3 (4x4 for the T H I C C ones), and both will deal 100 damage to Doom during Shield Phase.
If you fail to kill the grub before it reaches Doom's centre tile, it'll absorb the grub, dealing incrementally more damage throughout the rest of the Delve.
For example, if you've let Doom absorb their 5th grub dealing you 5 damage and healing itself, in the future, either during that delve or a deeper one, upon consuming their 6th grub it will deal you 6 damage and also recover hp, so don't let 'em eat too much if you can help it as it'll gradually punish you by making you take a lot more damage in the future. This resets to 0 stacks on a new delve run.
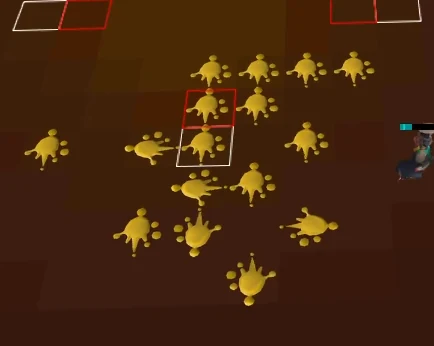
Poison Tiles (Yellow Acid, Poison Spit etc.)
Whenever Doom takes damage, they'll spit yellow acid on the ground that will venom you if you step on it and cause a small amount of damage to the player. These tiles can only be cleared with the Volatile Earth Shield, Holy water, or when Delve 6 begins, all poisoned tiles will be automatically cleared. Other than these two scenarios, the poisoned tiles are otherwise permanent and will stay between delves until you reset.
As you delve deeper, Doom will gradually increase its intensity of spitting poison.
Volatile Earth Shield
During the Volatile Earth phase, floating rocks (Volatile Earth) will spawn. Hitting two of these will spawn a Shield that'll move and protect the player from Shockwaves, as long as they're in the shield.
The first Volatile Earth hit will be the destination. The second Volatile Earth hit will be the starting location, will immediately activate the shield and start to move towards the First Volatile Earth hit.
When it reaches the location of the First Volatile Earth hit, the shield will vanish.
The centre tile of this shield will also clear any poisoned tiles as it moves.
The idea is to lower Doom's health as low as possible in Car Phase, then spam click Doom as it's phasing into Volatile Earth phase to ensure you hit it with a kill shot as fast as possible before the volatile earths appear (if you do it correctly, you have around 10 seconds to activate the shield before it despawns, also requires you lower doom's health as much as possible without killing him in car phase).
MAKE SURE WHEN YOU SPAM CLICK DOOM POST-CAR PHASE THAT YOU STAND AT LEAST A FEW TILES AWAY FROM DOOM OTHERWISE YOUR PROJECTILE WILL KILL HIM TOO FAST AND IT WON'T WORK.
Alternative Poison Clear Tech
If you can't land the finishing kill shot/first hit post-car phase.
Holy Water (reward for killing Doom prior to Deep Delves with a Melee Punish)
When Doom is charging his cannon and able to be punished with a melee attack, if this melee attack were to kill Doom in that delve, they'll toss holy water in all directions (you do not need to be standing anywhere specific), and you will gradually recover a moderate amount of Hitpoints and Prayer. (28 Hitpoints, 14 Prayer, 25% special attack energy, and it clears acid blood in a 3x3.)
Phases
Standard Phase
Doom will attack you with Basic Attacks, Rock Throw, summon Larvae Grubs and occasionally, after a Rock Throw, charge up his cannon, allowing you to do a Melee Punish.
Shield Phase
A blue bar will appear above Doom and will slowly charge. Upon fully charging, the player will be hit with a heavy, unblockable attack. You can reset the progress of this blue bar by attacking Doom with Demonbane Weaponry, which will cause him to stagger on each hit. Ancient Godsword special attack will also stagger Doom, as long as you have a Demonbane weapon equipped when the effect of the Ancient Godsword special attack activates. Doom will also spawn Larvae Grubs, which can be killed near Doom to deal 100 damage to Doom's shield, and if done correctly, will not damage the player if they are within the range of the Grubs' death explosion.
Car Phase (otherwise known as the less cool name; Burrowing Phase)
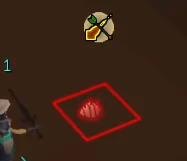
Doom will throw Basic Attacks while targeting your location and sliding to it. If you get run over, you'll be pushed back and take a substantial amount of damage. An eye will appear in the ground when Doom has chosen a location to drive towards, so when you spot the eye, you'd best move. The player will also have 100% Accuracy during this phase, so make sure not to waste ticks dealing damage. Rocks will be dropped at the beginning of this phase, but rocks from previous Rock Throws that Doom has done before the phase will still be available and after each 'Drive ', Doom will do a Shockwave Slam after his standard attacks, but this will only happen in Delve 6 and beyond. You must be behind a rock when Doom slams the ground; if you are not, you'll be hit with moderate damage. If you struggle to stand behind the rock correctly, line up the camera with yourself, the rock you're hiding behind and Doom and imagine water flowing around the rock. If it seems like Doom will hit you, re-adjust your position so it doesn't.
Volatile Earth Phase
Doom will spawn a bunch of Volatile Earth objects around itself. The first rock you shoot will be the destination; the second rock you shoot will be the start of the moving shield that you must stay in as it moves towards the destination (first rock), as Doom will do shockwaves and will deal heavy damage unless you're protected within the moving golden shield. When this phase starts, immediately hit a destination rock and line up a long, preferably as straight as possible path, as curving the shield can get you killed if you're not used to the movement. After about 3-4 Scorching Bow shots or 2-3 Twisted Bow shots, activate the second rock and move accordingly. During this phase, Doom will also use Standard Attacks and Rock Throw, so be wary of those. After this phase ends, it'll roll back to the Standard Phase and, after a few attacks, will roll into Shield Phase again.
Plugins
Demonic Larva Tracker — I personally only use this for the 'Expand Loot UI' and 'Unique Loot Sund' option under 'Extra'. I've already marked all the grubs manually myself prior to this plugin being released, so if you want to skip that process you could use this. If you have 'Expand Loot UI' enabled, there is a very cool reference to the Doom games if you're able to do enough delves to have a third row of items in the earned loot section after a delve.
Blindfold — Set to hide terrain and make use of the Skybox plugin.
Skybox — Used in conjunction with Blindfold; otherwise the ground will be pitch black, and you won't be able to see the shadow tiles. My personal hex colour is #2F414B.
Low Detail — Useful for hiding all the random crappy rocks that make the game look bad and cluttered.
Better NPC Highlight
If you want to hide the Earthen Shield for the Volatile Earth phase, put it under the Entity Hide section, ID is 14715. (Be sure to mark the shield before hiding it visually)
Entity Hider
Very useful for skipping the death animation with any target, especially when grubs/doom dies. Hide dead NPCs = On.
Boss HP Bar Offset
Useful for dragging the Boss Health bar closer to the top of your screen. HP Bar Offset = 5.
Improved Tile Indicators
Game will render the NPC above your tiles. This means that tiles will no longer visually appear over NPCs, which makes it easier to see what the target is doing. (Warning: This will lower your FPS depending on the Intensity of the situation and also your PC. So if you notice that your game is struggling more than usual, toggle this off.)
Prioritising Mechanics
When it comes to learning Doom, it's important to know which attacks are worth worrying about over others. This doesn't mean that a mechanic with a lower priority should be entirely ignored, but important if you can't keep up with everything just yet.
Very High > High > Medium > Low Below is in descending order of most important to least important.
[VERY HIGH] Melee Punish Cannon Charge — Hit with a strong weapon; do not allow a full charge, otherwise you miss a chunk of free damage, potential holy water pre-deep delves, and also take a lot of damage.
[VERY HIGH] Shield Phase Cannon Charge — Stagger with Demonbane weaponry; do not allow a full charge unless trying to speedrun.
[VERY HIGH] Rock Throw - Fragments — Initial Static Rock that will spawn at the initial location of the player when rock breaks. Always move from the initial location after the rock breaks; being stalled can cause an easy, frustrating death as you become unable to change prayers or heal.
[HIGH] Standard Attacks — Melee, Ranged, Magic, can hit up to 65 damage in deep delves and 58 damage while in car phase if not prayed against correctly.
[HIGH] Drive Knockback — During Car Phase, when Doom slides to a target tile, if you get hit by Doom, you'll be knocked back, stalled, take a moderate amount of damage and possibly not make it to cover in time, thus taking Shockwave damage.
[MEDIUM] Shockwave — During Car Phase, deals medium damage to the player, but praying against correct Standard Attacks can be more important since Doom can throw between 1 - 3 attacks (each of which is capable of dealing 58 damage) while sliding in car phase, which deal more damage than a shockwave.
[LOW-MEDIUM] Larvae Consumption — Not super important while learning, but quite important when deep delving, as Doom eating too many larvae throughout a run can turn this into a threatening mechanic.
[LOW] Larvae Splash Damage — Whenever you hit a larvae, they'll explode in a 3x3 or a 4x4 if T H I C C. This will not damage you if in range of Doom.
[LOW] Rock Throw - Fragments extra rocks that'll deal a small amount of damage.
[LOW] Acid/Venom Tiles — Don't be afraid to step into poison tiles to get to safety from shockwaves or car slides. Whenever you step on an acid tile, they deal a very low amount of damage for every tick, and oftentimes it's more important to prioritise the other mechanics.
Ground Markers
For Deep Delves (when imported, tiles will only appear in Delve 6 and beyond).
You can add, remove or adjust tiles by holding Shift AND pressing right-click on a tile.
As you delve deeper, Doom will gradually get more complex, deal more damage and become faster. This also means more variety of uniques that you can roll and better chances the deeper you go until Delve 9 and beyond, where the chances will be capped at its highest.
How to read the badges: DIFFICULTY UP this mechanic gets harder at this delve than the last one — read the bolded words in that line to see what changed. NEW MECHANIC appears for the first time at this delve. MECHANIC REMOVED stops working from this delve on. No badge = unchanged from the previous delve (still listed in full so each delve reads on its own).
Delve 1
Uniques: None
Standard Attacks — Doom will attack with either Melee, Ranged or Magic. Pray accordingly to the colour of attack.
Larvae Grubs — Grubs will spawn; hit with any demonbane weapon once or any other type of weapon twice. Grubs will explode on death, and if you are in range of the explosion, it will damage you slightly; however, killing grubs near doom causes the explosion to hurt Doom slightly but also prevents the explosion from damaging you.
Rock Throw — Doom will throw a rock. Once it explodes mid-air, it will send shrapnel and a solid rock. The solid rock will land on the tile you were standing on when the rock exploded. If the player has not moved after the explosion, they'll take damage, be knocked back and be stalled from actions such as moving, changing prayers or eating/drinking, etc. Shrapnel (other tiles that the player was not standing on during the explosion) will deal a small amount of damage but will not knock back or stall the player. After the rock breaks, ONE Standard Attack will appear from the rock based on the colour of the rock and will have to be prayed against.
Melee Punish Cannon Charge — After a Rock Throw, Doom will activate overhead prayers and begin to charge their cannon. You must hit it with your strongest melee weapon. This weapon will deal a 100% accurate standard hit alongside bonus echo damage based on your melee strength at the moment of the hit and cancel the charge.
Holy Water — Killing Doom with a Melee Punish will award the player with holy water healing. Heals players' health and prayer.
Volatile Earth — If you take too long to defeat Doom, it will eventually phase into the Volatile Earth phase. The first Volatile Earth hit will be the destination; the second Volatile Earth hit will be the start. Upon hitting two Volatile Earths, a moving Shield will appear that you must stay in while Doom does Shockwaves.
Shockwaves — Some time after the Volatile Earth phase starts, Doom will do ONE Shockwave Attack. Stay in the Earthern Shield to avoid taking damage.
Delve 2
Uniques: Mokhaiotl Cloth
Standard Attacks — Doom will attack with either Melee, Ranged or Magic. Pray accordingly to the colour of attack.
Larvae Grubs — Grubs will spawn; hit with any demonbane weapon once or any other type of weapon twice. Grubs will explode on death, and if you are in range of the explosion, it will damage you slightly; however, killing grubs near doom causes the explosion to hurt Doom slightly but also prevents the explosion from damaging you.
DIFFICULTY UPRock Throw — Doom will throw a rock. Once it explodes mid-air, it will send shrapnel and a solid rock. The solid rock will land on the tile you were standing on when the rock exploded. If the player has not moved after the explosion, they'll take damage, be knocked back and be stalled from actions such as moving, changing prayers or eating/drinking, etc. Shrapnel (other tiles that the player was not standing on during the explosion) will deal a small amount of damage but will not knock back or stall the player. After the rock breaks, TWO Standard Attacks will appear from the rock based on the colour of the rock, will alternate between Mage/Range or Range/Mage and will have to be prayed against.
Melee Punish Cannon Charge — After a Rock Throw, Doom will activate overhead prayers and begin to charge their cannon. You must hit it with your strongest melee weapon. This weapon will deal a 100% accurate standard hit alongside bonus echo damage based on your melee strength at the moment of the hit and cancel the charge.
Holy Water — Killing Doom with a Melee Punish will award the player with holy water healing. Heals players' health and prayer.
Volatile Earth — If you take too long to defeat Doom, it will eventually phase into the Volatile Earth phase. The first Volatile Earth hit will be the destination; the second Volatile Earth hit will be the start. Upon hitting two Volatile Earth's, a moving Shield will appear that you must stay in while Doom does Shockwaves.
Shockwaves — Some time after the Volatile Earth phase starts, Doom will do ONE Shockwave Attack. Stay in the Earthern Shield to avoid taking damage.
Delve 3
Uniques: Mokhaiotl Cloth, Eye of Ayak
Standard Attacks — Doom will attack with either Melee, Ranged or Magic. Pray accordingly to the colour of attack.
DIFFICULTY UPLarvae Grubs — Grubs will spawn with ONE overhead prayer that will be immune to one type of damage; hit with the correct style demonbane weapon once or twice with the correct style standard combat weapon. Grubs will explode on death, and if you are in range of the explosion, it will damage you slightly; however, killing grubs near Doom causes the explosion to hurt Doom slightly but also prevents the explosion from damaging you. Deals HEAVY DAMAGE to Doom during Shield Phase.
Rock Throw — Doom will throw a rock. Once it explodes mid-air, it will send shrapnel and a solid rock. The solid rock will land on the tile you were standing on when the rock exploded. If the player has not moved after the explosion, they'll take damage, be knocked back and be stalled from actions such as moving, changing prayers or eating/drinking, etc. Shrapnel (other tiles that the player was not standing on during the explosion) will deal a small amount of damage but will not knock back or stall the player. After the rock breaks, TWO Standard Attacks will appear from the rock based on the colour of the rock, will alternate between Mage/Range or Range/Mage and will have to be prayed against.
Melee Punish Cannon Charge — After a Rock Throw, Doom will activate overhead prayers and begin to charge their cannon. You must hit it with your strongest melee weapon. This weapon will deal a 100% accurate standard hit alongside bonus echo damage based on your melee strength at the moment of the hit and cancel the charge.
Holy Water — Killing Doom with a Melee Punish will award the player with holy water healing. Heals players' health and prayer.
Volatile Earth — If you take too long to defeat Doom, it will eventually phase into the Volatile Earth phase. First Volatile Earth hit will be the destination; second Volatile Earth hit will be the start. Upon hitting two Volatile Earths, a moving Shield will appear that you must stay in while Doom does Shockwaves.
DIFFICULTY UPShockwaves — Some time after the Volatile Earth phase starts, Doom will do TWO Shockwave Attacks. Stay in the Earthern Shield to avoid taking damage.
NEW MECHANICShield Charge — At 75% Health, Doom will phase into Shield Charge. (To know if this isn't a melee punish, see if he has overheads. If he does not have overheads, it's in standard Shield Charge Phase, and not a melee punish) Hit with demonbane weapons, hit grubs when they're close to echo the explosion damage to doom and also become invulnerable to that same explosion.
Delve 4
Uniques: Mokhaiotl Cloth, Eye of Ayak, Avernic Treads
Standard Attacks — Doom will attack with either Melee, Ranged or Magic. Pray accordingly to the colour of attack.
DIFFICULTY UPLarvae Grubs — Grubs will spawn with TWO overhead prayers that will be immune to two types of damage; hit with the correct style demonbane weapon once or twice with the correct style standard combat weapon. Grubs will explode on death, and if you are in range of the explosion, it will damage you slightly; however, killing grubs near Doom causes the explosion to hurt Doom slightly but also prevents the explosion from damaging you. Deals HEAVY DAMAGE to Doom during Shield Phase.
DIFFICULTY UPRock Throw — Doom will throw a rock. Once it explodes mid-air, it will send shrapnel and a solid rock. The solid rock will land on the tile you were standing on when the rock exploded. If the player has not moved after the explosion, they'll take damage, be knocked back and be stalled from actions such as moving, changing prayers or eating/drinking, etc. Shrapnel (other tiles that the player was not standing on during the explosion) will deal a small amount of damage but will not knock back or stall the player. After the rock breaks, THREE Standard Attacks will appear from the rock based on the colour of the rock, will alternate between Mage/Range or Range/Mage and will have to be prayed against.
Melee Punish Cannon Charge — After a Rock Throw, Doom will activate overhead prayers and begin to charge their cannon. You must hit it with your strongest melee weapon. This weapon will deal a 100% accurate standard hit alongside bonus echo damage based on your melee strength at the moment of the hit and cancel the charge.
Volatile Earth — If you take too long to defeat Doom, it will eventually phase into the Volatile Earth phase. First Volatile Earth hit will be the destination; second Volatile Earth hit will be the start. Upon hitting two Volatile Earths, a moving Shield will appear that you must stay in while Doom does Shockwaves.
Holy Water — Killing Doom with a Melee Punish will award the player with holy water healing. Heals players' health and prayer.
Shockwaves — Some time after the Volatile Earth phase starts, Doom will do TWO Shockwave Attacks. Stay in the Earthern Shield to avoid taking damage.
Shield Charge — At 75% Health, Doom will phase into Shield Charge. (To know if this isn't a melee punish, see if he has overheads. If he does not have overheads, it's in standard Shield Charge Phase, and not a melee punish) Hit with demonbane weapons, hit grubs when they're close to echo the explosion damage to doom and also become invulnerable to that same explosion.
Delve 5
Uniques: Mokhaiotl Cloth, Eye of Ayak, Avernic Treads
Standard Attacks — Doom will attack with either Melee, Ranged or Magic. Pray accordingly to the colour of attack.
DIFFICULTY UPLarvae Grubs — Two grubs will spawn with TWO overhead prayers that will be immune to two types of damage; hit with the correct style demonbane weapon once or twice with the correct style standard combat weapon. Grubs will explode on death, and if you are in range of the explosion, it will damage you slightly; however, killing grubs near Doom causes the explosion to hurt Doom slightly but also prevents the explosion from damaging you. Deals HEAVY DAMAGE to Doom during Shield Phase.
Rock Throw — Doom will throw a rock. Once it explodes mid-air, it will send shrapnel and a solid rock. The solid rock will land on the tile you were standing on when the rock exploded. If the player has not moved after the explosion, they'll take damage, be knocked back and be stalled from actions such as moving, changing prayers or eating/drinking, etc. Shrapnel (other tiles that the player was not standing on during the explosion) will deal a small amount of damage but will not knock back or stall the player. After the rock breaks, THREE Standard Attacks will appear from the rock based on the colour of the rock, will alternate between Mage/Range or Range/Mage and will have to be prayed against.
Melee Punish Cannon Charge — After a Rock Throw, Doom will activate overhead prayers and begin to charge their cannon. You must hit it with your strongest melee weapon. This weapon will deal a 100% accurate standard hit alongside bonus echo damage based on your melee strength at the moment of the hit and cancel the charge.
Holy Water — Killing Doom with a Melee Punish will award the player with holy water healing. Heals players' health and prayer.
DIFFICULTY UPVolatile Earth — If you take too long to defeat Doom OR after the burrowing phase, it phases into the Volatile Earth phase. First Volatile Earth hit will be destination, Second Volatile Earth hit will be the start. Upon hitting two Volatile Earth's, a moving Shield will appear that you must stay in while Doom does Shockwaves.
DIFFICULTY UPShockwaves — Some time after the Volatile Earth phase starts, Doom will do THREE Shockwave Attacks. Stay in the Earthern Shield to avoid taking damage.
Shield Charge — At 75% Health, Doom will phase into shield charge. (To know if this isn't a melee punish, see if he has overheads. If he does not have overheads, it's in standard Shield Charge Phase, and not a melee punish) Hit with demonbane weapons, hit grubs when they're close to echo the explosion damage to doom and also become invulnerable to that same explosion.
NEW MECHANICBurrowing — After Shield Charge Phase, Doom will enter Car Phase. An eye will appear under you after some time. This is where Doom will slide towards. If you get hit, you'll take damage, be knocked back and be stalled. Doom will slide TWICE. Move out of the way when the eye appears on the ground. Soon after this phase, Doom will enter the Volatile Earth phase.
Delve 6
Uniques: Mokhaiotl Cloth, Eye of Ayak, Avernic Treads, Dom (Pet)
DIFFICULTY UPStandard Attacks — Doom will attack with either Melee, Ranged or Magic. Pray accordingly to the colour of the attack. Doom will also now do Standard Attacks DURING Car Phase Slides depending on length of slide.
Larvae Grubs — Two grubs will spawn with TWO overhead prayers that will be immune to two types of damage, hit with the correct style demonbane weapon once or twice with the correct style standard combat weapon. Grubs will explode on death, and if you are in range of the explosion, it will damage you slightly; however, killing grubs near Doom causes the explosion to hurt Doom slightly but also prevents the explosion from damaging you. Deals HEAVY DAMAGE to Doom during Shield Phase.
Rock Throw — Doom will throw a rock. Once it explodes mid-air, it will send shrapnel and a solid rock. The solid rock will land on the tile you were standing on when the rock exploded. If the player has not moved after the explosion, they'll take damage, be knocked back and be stalled from actions such as moving, changing prayers or eating/drinking, etc. Shrapnel (other tiles that the player was not standing on during the explosion) will deal a small amount of damage but will not knock back or stall the player. After the rock breaks, THREE Standard Attacks will appear from the rock based on the colour of the rock, will alternate between Mage/Range or Range/Mage and will have to be prayed against.
Melee Punish Cannon Charge — After a Rock Throw, Doom will activate overhead prayers and begin to charge their cannon. You must hit it with your strongest melee weapon. This weapon will deal a 100% accurate standard hit alongside bonus echo damage based on your melee strength at the moment of the hit and cancel the charge.
Holy Water — Killing Doom with a Melee Punish will award the player with holy water healing. Heals players' health and prayer.
Volatile Earth — If you take too long to defeat Doom OR after the burrowing phase, it phases into the Volatile Earth phase. First Volatile Earth hit will be destination, Second Volatile Earth hit will be the start. Upon hitting two Volatile Earth's, a moving Shield will appear that you must stay in while Doom does Shockwaves.
Shockwaves — Some time after the Volatile Earth phase starts, Doom will do THREE Shockwave Attacks. Stay in the Earthern Shield to avoid taking damage.
Shield Charge — At 75% Health, Doom will phase into Shield Charge. (To know if this isn't a melee punish, see if he has overheads. If he does not have overheads, it's in standard Shield Charge Phase, and not a melee punish) Hit with demonbane weapons, hit grubs when they're close to echo the explosion damage to doom and also become invulnerable to that same explosion.
DIFFICULTY UPBurrowing — After Shield Charge Phase, Doom will enter Car Phase. An eye will appear under you after some time. This is where Doom will slide towards. If you get hit, you'll take damage, be knocked back and be stalled. Doom will slide THREE TIMES while firing Standard Attacks depending on how far you dragged him. Move out of the way when the eye appears on the ground. He will also do a Shockwave after each slide. Make sure you're behind a rock before the slam occurs; otherwise you'll take moderate damage. Soon after this phase, Doom will enter the Volatile Earth phase.
Delve 7
Uniques: Mokhaiotl Cloth, Eye of Ayak, Avernic Treads, Dom (Pet)
Standard Attacks — Doom will attack with either Melee, Ranged or Magic. Pray accordingly to the colour of attack. Doom will also do Standard Attacks DURING Car Phase Slides depending on the length of the slide.
Larvae Grubs — Two grubs will spawn with TWO overhead prayers that will be immune to two types of damage, hit with the correct style demonbane weapon once or twice with the correct style standard combat weapon. Grubs will explode on death, and if you are in range of the explosion, it will damage you slightly; however, killing grubs near Doom causes the explosion to hurt Doom slightly but also prevents the explosion from damaging you. Deals HEAVY DAMAGE to Doom during Shield Phase.
DIFFICULTY UPRock Throw — Doom will throw a rock. Once it explodes mid-air, it will send shrapnel and a solid rock. The solid rock will land on the tile you were standing on when the rock exploded. If the player has not moved after the explosion, they'll take damage, be knocked back and be stalled from actions such as moving, changing prayers or eating/drinking, etc. Shrapnel (other tiles that the player was not standing on during the explosion) will deal a small amount of damage but will not knock back or stall the player. After the rock breaks, THREE Standard Attacks will appear from the rock based on the colour of the rock, will alternate between Mage/Range or Range/Mage, will have to be prayed against and approach the player much faster than previous delves. Pray against the attacks as soon as the rock breaks.
Melee Punish Cannon Charge — After a Rock Throw, Doom will activate overhead prayers and begin to charge their cannon. You must hit it with your strongest melee weapon. This weapon will deal a 100% accurate standard hit alongside bonus echo damage based on your melee strength at the moment of the hit and cancel the charge.
Holy Water — Killing Doom with a Melee Punish will award the player with holy water healing. Heals players' health and prayer.
Volatile Earth — If you take too long to defeat Doom OR after the burrowing phase, it phases into the Volatile Earth phase. First Volatile Earth hit will be the destination; second Volatile Earth hit will be the start. Upon hitting two Volatile Earths, a moving Shield will appear that you must stay in while Doom does Shockwaves.
DIFFICULTY UPShockwaves — Some time after the Volatile Earth phase starts, Doom will do FOUR Shockwave Attacks. Stay in the Earthen Shield to avoid taking damage.
Shield Charge — At 75% Health, Doom will phase into Shield Charge. (To know if this isn't a melee punish, see if he has overheads. If he does not have overheads, it's in standard Shield Charge Phase, and not a melee punish) Hit with demonbane weapons, hit grubs when they're close to echo the explosion damage to doom and also become invulnerable to that same explosion.
Burrowing — After Shield Charge Phase, Doom will enter Car Phase. An eye will appear under you after some time. This is where Doom will slide towards. If you get hit, you'll take damage, be knocked back and be stalled. Doom will slide THREE TIMES while firing Standard Attacks depending on how far you dragged him. Move out of the way when the eye appears on the ground. He will also do a Shockwave after each slide. Make sure you're behind a rock before the slam occurs; otherwise you'll take moderate damage. Soon after this phase, Doom will enter the Volatile Earth phase.
Delve 8 — Deep Delve
Uniques: Mokhaiotl Cloth, Eye of Ayak, Avernic Treads, Dom (Pet)
Standard Attacks — Doom will attack with either Melee, Ranged or Magic. Pray accordingly to the colour of attack. Doom will also do Standard Attacks DURING Car Phase Slides depending on the length of the slide.
DIFFICULTY UPLarvae Grubs — A 2x2 T H I C C grub will spawn with TWO overhead prayers that will be immune to two types of damage, hit TWICE with the correct style demonbane weapon once or FOUR TIMES with the correct style standard combat weapon. Grubs will explode on death, and if you are in range of the explosion, it will damage you; however, killing grubs near Doom causes the explosion to hurt Doom moderately but also prevents the explosion from damaging you. Deals HEAVY DAMAGE to Doom during Shield Phase.
DIFFICULTY UPRock Throw — Doom will throw TWO rocks; when either rock explodes mid-air, it will send shrapnel and a solid rock. If the player has not moved after the explosion, they'll take damage, be knocked back and be stalled from actions such as moving, changing prayers or eating/drinking, etc. Shrapnel (other tiles that the player was not standing on during the explosion) will deal a small amount of damage but will not knock back or stall the player. After the SECOND rock breaks, SIX Standard Attacks will appear from the rock based on the colour of the rock, will alternate between Mage/Range or Range/Mage, will have to be prayed against and approach the player much faster than previous delves. Pray against the attacks as soon as the rock breaks.
Melee Punish Cannon Charge — After a Rock Throw, Doom will activate overhead prayers and begin to charge their cannon. You must hit it with your strongest melee weapon. This weapon will deal a 100% accurate standard hit alongside bonus echo damage based on your melee strength at the moment of the hit and cancel the charge.
Holy Water — Killing Doom with a Melee Punish will award the player with holy water healing. Heals players' health and prayer.
Volatile Earth — If you take too long to defeat Doom OR after the burrowing phase, it phases into the Volatile Earth phase. First Volatile Earth hit will be the destination; second Volatile Earth hit will be the start. Upon hitting two Volatile Earths, a moving Shield will appear that you must stay in while Doom does Shockwaves.
Shockwaves — Some time after the Volatile Earth phase starts, Doom will do FIVE Shockwave Attacks. Stay in the Earthen Shield to avoid taking damage.
Shield Charge — At 75% Health, Doom will phase into Shield Charge. (To know if this isn't a melee punish, see if he has overheads. If he does not have overheads, it's in standard Shield Charge Phase, and not a melee punish) Hit with demonbane weapons, hit grubs when they're close to echo the explosion damage to doom and also become invulnerable to that same explosion.
Burrowing — After Shield Charge Phase, Doom will enter Car Phase. An eye will appear under you after some time. This is where Doom will slide towards. If you get hit, you'll take damage, be knocked back and be stalled. Doom will slide THREE TIMES while firing Standard Attacks depending on how far you dragged him. Move out of the way when the eye appears on the ground. He will also do a Shockwave after each slide. Make sure you're behind a rock before the slam occurs; otherwise you'll take moderate damage. Soon after this phase, Doom will enter the Volatile Earth phase.
Holy Water — No longer triggers
Delve 9+ — Deep Delves
Uniques: Highest possible chances: Mokhaiotl Cloth, Eye of Ayak, Avernic Treads, Dom (Pet)
Standard Attacks — Doom will attack with either Melee, Ranged or Magic. Pray accordingly to the colour of the attack. Doom will also do Standard Attacks DURING Car Phase Slides depending on the length of the slide.
Larvae Grubs — A 2x2 T H I C C grub will spawn with TWO overhead prayers that will be immune to two types of damage, hit TWICE with the correct style demonbane weapon once or FOUR TIMES with the correct style standard combat weapon. Grubs will explode on death, and if you are in range of the explosion, it will damage you moderately; however, killing grubs near Doom causes the explosion to hurt Doom moderately but also prevents the explosion from damaging you. Deals HEAVY DAMAGE to Doom during Shield Phase.
Rock Throw — Doom will throw TWO rocks. When either rock explodes mid-air, it will send shrapnel and a solid rock. If the player has not moved after the explosion, they'll take damage, be knocked back and be stalled from actions such as moving, changing prayers or eating/drinking, etc. Shrapnel (other tiles that the player was not standing on during the explosion) will deal a small amount of damage but will not knock back or stall the player. After the SECOND rock breaks, SIX Standard Attacks will appear from the rock based on the colour of the rock, will alternate between Mage/Range or Range/Mage, will have to be prayed against and approach the player much faster than previous delves. Pray against the attacks as soon as the rock breaks.
Melee Punish Cannon Charge — After a Rock Throw, Doom will activate overhead prayers and begin to charge their cannon. You must hit it with your strongest melee weapon. This weapon will deal a 100% accurate standard hit alongside bonus echo damage based on your melee strength at the moment of the hit and cancel the charge.
MECHANIC REMOVEDHoly Water — Killing Doom with a Melee Punish will award the player with holy water healing. Heals players' health and prayer.
Volatile Earth — If you take too long to defeat Doom OR after the burrowing phase, it phases into the Volatile Earth phase. First Volatile Earth hit will be the destination; second Volatile Earth hit will be the start. Upon hitting two Volatile Earths, a moving Shield will appear that you must stay in while Doom does Shockwaves.
Shockwaves — Some time after the Volatile Earth phase starts, Doom will do FIVE Shockwave Attacks. Stay in the Earthern Shield to avoid taking damage.
Shield Charge — At 75% Health, Doom will phase into Shield Charge. (To know if this isn't a melee punish, see if he has overheads. If he does not have overheads, it's in standard Shield Charge Phase, and not a melee punish) Hit with demonbane weapons, hit grubs when they're close to echo the explosion damage to doom and also become invulnerable to that same explosion.
Burrowing — After Shield Charge Phase, Doom will enter Car Phase. An eye will appear under you after some time. This is where Doom will slide towards. If you get hit, you'll take damage, be knocked back and be stalled. Doom will slide THREE TIMES while firing Standard Attacks depending on how far you dragged him. Move out of the way when the eye appears on the ground. He will also do a Shockwave after each slide. Make sure you're behind a rock before the slam occurs; otherwise you'll take moderate damage. Soon after this phase, Doom will enter the Volatile Earth phase.
TL;DR — "I ain't readin' all that"
Bring Void, your best ranged gear (twisted bow > scorching bow), anguish/rupture, etc.
Demonbane weapons for all three styles of combat.
Lightbearer.
Antivenom. Prayer Potions or Brews + Super Restores.
Hard Food. Double Eats. Triple Eats.
Bring Noxious or Chally Spec for Melee Punish.
ZCB mostly for Delves 1-7.
Ancient Godsword Spec for healing during shield phase.
Eldritch Nightmare Staff Spec for prayer recovery during shield phase or optimally volatile earth phase.
Runes for Death Charge (preferably double).
Don't bring Thralls because they make too many acid tiles.
Boss turns blue but with overhead prayer = melee punish
Boss turns blue but with no overhead prayer = shield phase, hit with demonbane weapon
Eyeball during car phase, move when it appears, doom will slide towards it.
Move behind rock from Delve 6 and beyond to avoid damage from shockwave.
Volatile Earth, first rock = destination. The second rock spawns a shield and will head towards the first rock. Activate before or as Doom starts shockwaves.
Don't let Doom eat grubs; incremental damage, kill them.
Kill grubs near Doom for damage, even more damage during shield phase.
See Tech videos for guidance on how to handle mechanics.
Best Guide to Doom of Mokhaiotl · By The Professor
The Professor is an experienced Old School RuneScape player specialising in high-level PvM. Drawing on extensive first-hand experience, these guides break down mechanics, gear, and advanced strategy in the depth serious players actually need.
Train Fishing with the OSRS Leechfin method: up to 100K XP/hr with no tick manipulation. Full route to the spots, all 3 methods, Blood Sac profits & FAQs.