OSRS Fire Cape Guide: Jad, Healers & Wave Strategies
By Alberjma
Nov 10, 2026
By Alberjma
OSRS Firecape Guide
You earn the Fire Cape by killing TzTok-Jad on wave 63 of the TzHaar Fight Cave. Protect from Missiles and Protect from Magic prayers are needed. A run takes 40 minutes to 3 hours (depending on your ranged level and gear).
Most first attempts end at Jad, when you pray against the wrong attack style. The Fire cape gives +4 Strength bonus, +2 Prayer bonus, +11 in all defence bonuses, and +1 in all attack bonuses (OSRS Wiki, checked October 2026). It is the best melee cape before the Infernal Cape.
Recommended Stats for the Fire Cape
75+ Ranged
43+ Prayer
60+ Hitpoints
If you want to keep your account with less prayer, you can still get the Fire Cape. Our No-prayer Fire Cape service completes the Fight Caves on your account, so you don't have to grind Prayer first.
Getting There
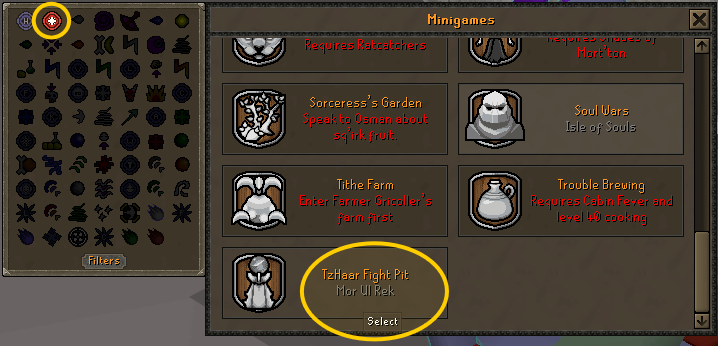
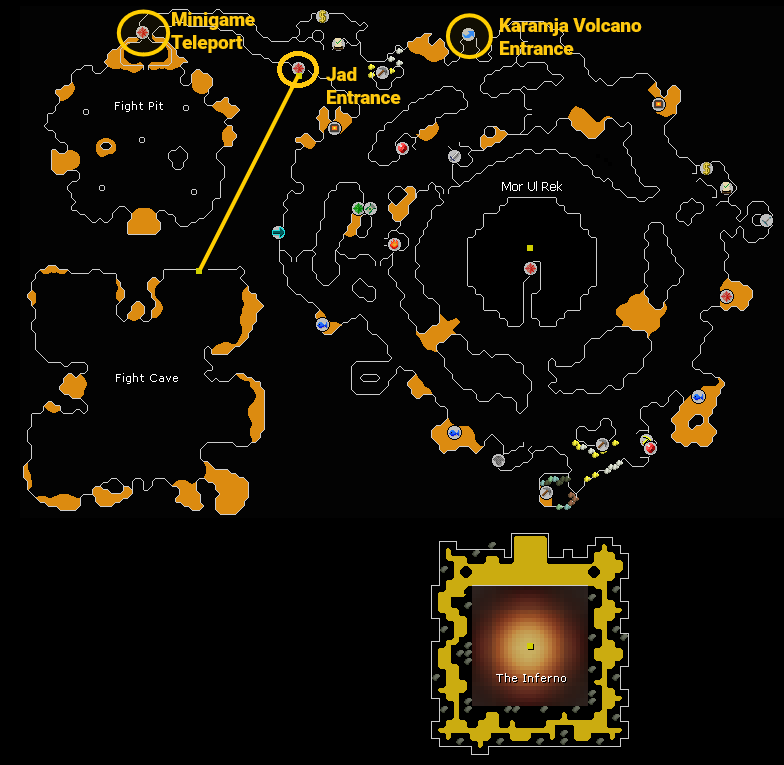
The fastest way to reach the starting point of the minigame to obtain the Fire Cape is by using the Minigame Teleport located next to the Home Teleport. Click on it and select the last option, TzHaar-Fight-Pit.
Once teleported, walk a few steps west. At this location, you'll find a Bank Chest right at the entrance of the minigame, where you can get ready.
Best Weapon for the Fight Caves
The most common weapon for main accounts to complete the Fire Cape minigame quickly is the Toxic Blowpipe. Its rapid rate of fire lets you kill the most enemies in the shortest time. It requires 75 Ranged to wear.
If you don't meet these requirements, or if you're an Ironman and don't have this weapon, don't worry. You can complete it with the Magic Shortbow, Rune C'bow, or even the Dorgeshuun Crossbow, depending on your experience with the game.
If you don't have a Toxic Blowpipe, It’s recommended to use our Fire cape Service. It's a guaranteed Fire cape attempt, and you won't have to worry about retrying the minigame every time you die (which is almost guaranteed if you've never been to this site).
Gear
Pick the setup that matches your build. If you can't wear a piece, swap it for the best item your levels allow.
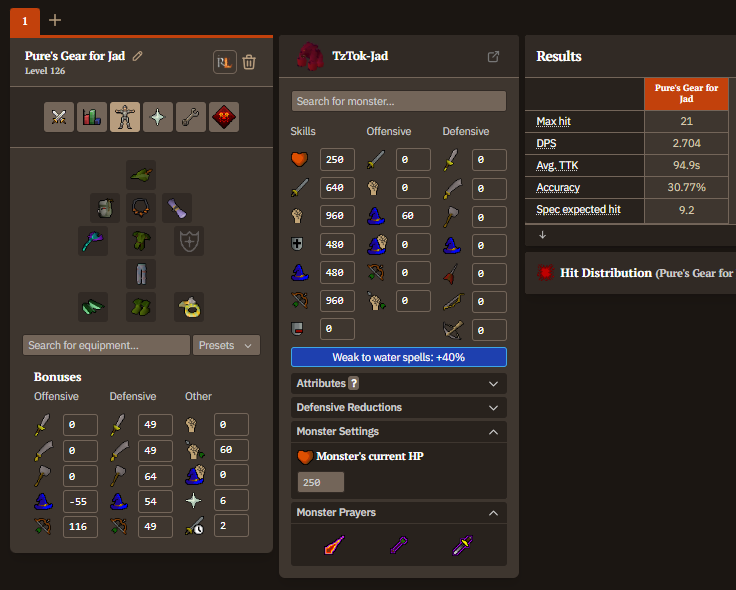
Pure Gear
Weapon: Toxic Blowpipe (x3000 Dragon Darts)
Head Slot: Robin Hood Hat
Bag Slot: Ava’s Accumulator
Amulet Slot: Necklace of Anguish
Body Slot: Ranger’s Tunic
Legs Slot: Hueycoatl Hide Chaps
Gloves Slot: Guthix Bracers
Boots Slot: Ranger’s Boots
Ring Slot: Archer’s Ring (i)
Arrow Slot: Any Blessing
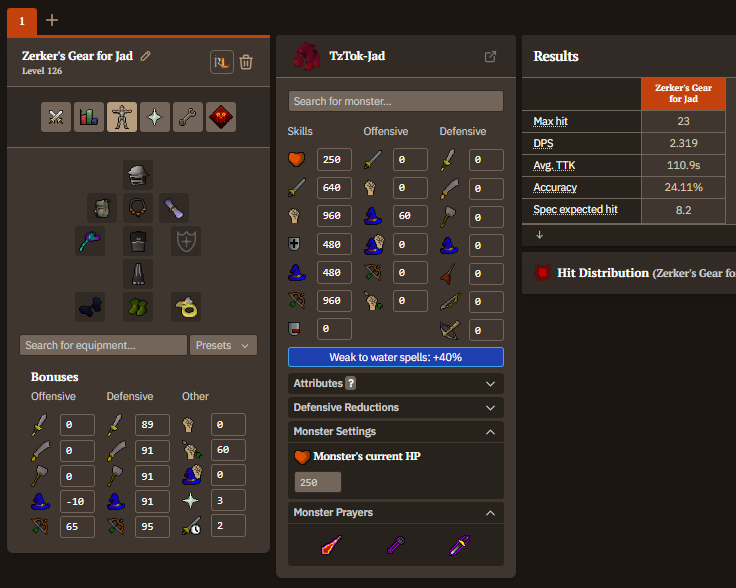
Zerker Gear
Weapon: Toxic Blowpipe (x3000 Dragon Darts)
Head Slot: Void Ranger Helm
Bag Slot: Ava’s Accumulator
Amulet Slot: Necklace of Anguish
Body Slot: Void Knight Top
Legs Slot: Void Knight Bottom
Gloves Slot: Void Knight Gloves
Boots Slot: Ranger’s Boots
Ring Slot: Archer’s Ring (i)
Arrow Slot: Any Blessing
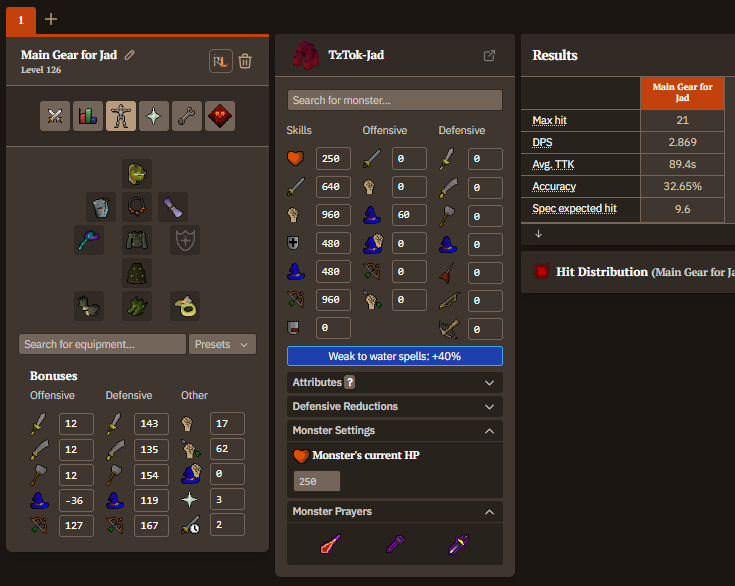
Main Gear
Weapon: Toxic Blowpipe (x3000 Dragon Darts)
Head Slot: Serpentine Helm
Bag Slot: Ava’s Assembler
Amulet Slot: Necklace of Anguish
Body Slot: Karil’s Leathertop
Legs Slot: Karil’s Skirt
Gloves Slot: Barrow Gloves
Boots Slot: Pegasian Boots
Ring Slot: Archer’s Ring (i)
Arrow Slot: Any Blessing
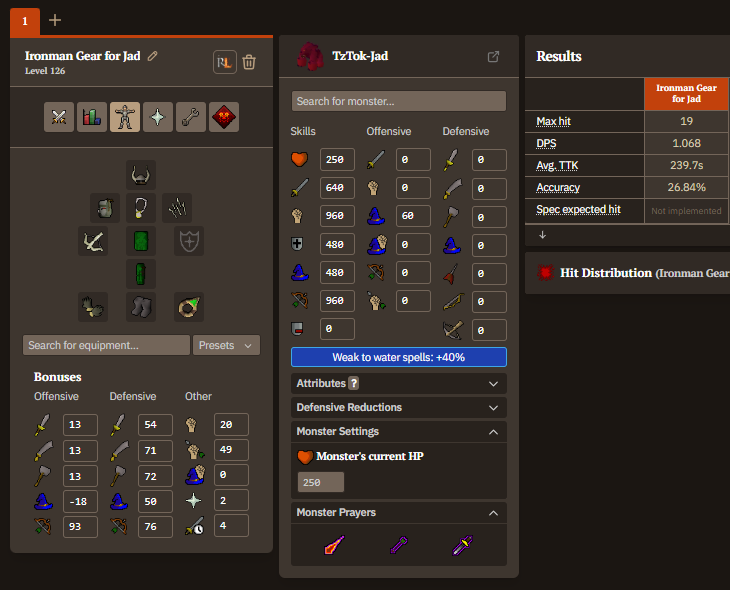
Ironman Gear
The Ironman armor will vary depending on the armor, food, potions, and weapons you have.
Weapon: Dorgeshuun Crossbow
Head Slot: Archer Helm
Bag Slot: Ava’s Accumulator
Amulet Slot: Amulet of Power
Shield Slot: Unholy Book
Body Slot: Green D’hide Body
Legs Slot: Green D’hide Chaps
Gloves Slot: Barrow Gloves
Boots Slot: Climbing Boots
Ring Slot: Explorer’s Ring
Arrow Slot: Bone Bolts
If you are an Ironman and have limited gear, it will be very hard to complete the fire cape waves. Please check out ourOSRS Ironman Fire Cape Service and order yours today!
Inventory
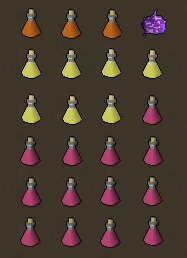
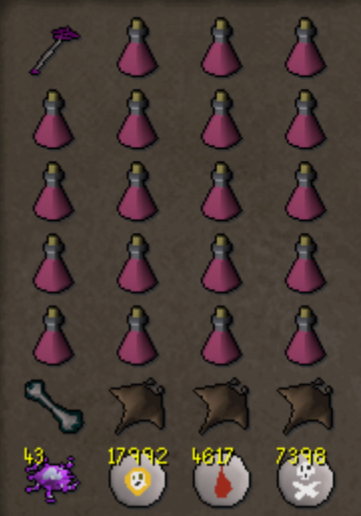
Main Inventory
x3 Bastion Potions
x7 Saradomin Brew
x200 Purple Sweets (will give run energy if needed).
x13 Super Restore Potions
Make sure to switch your inventory based on your experience. If you keep dying because you run out of food, please reduce the bastion potions. If you are low on Super Restore Potions after a run, then replace them with Saradomin brews. You need to find the specific inventory that will cater to your needs.
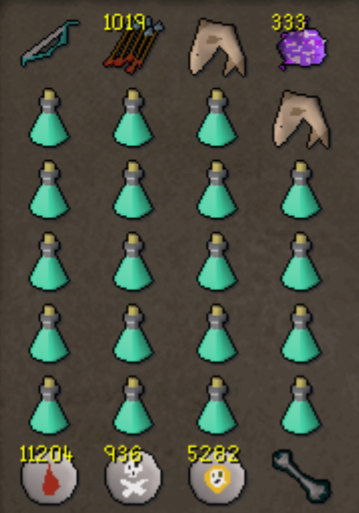
Ironman Inventory
In the end, each inventory is thought out for each OSRS account.
Magic Shortbow (Secondary weapon)
Rune Arrows
x2 Sharks
200+ Purple Sweets (Optional)
Holy Wrench (Optional)
Blood, Death, Chaos Runes
x19 Prayer Potions
PvP Ironman Inventory
Ironmen take the initiative to attempt the Fire Cape with the supplies they already have, in this case, those obtained from LMS or Bounty Hunter. To do this, it's necessary to complete the minigame in a PvP world.
Scout the area before switching worlds and attempting to enter the Fight Caves because other players might be able to attack you if you let them.
To obtain the Fire Cape, you must defeat Jad, a level 702 Boss Minigame. You fight 62 waves before Jad spawns on wave 63. The spawns follow fixed rotations, and a RuneLite plugin shows where each wave appears, so you can save prayer and food. If you die, you must restock your supplies and restart from wave 1.
Fight Cave NPCs
All monsters have their own mechanics, but this won't be the typical guide that you can find on the internet. At this level, I assume you already know the mechanics of each and have tried the minigame before.
Tz-Kih (Firebirds): They are firebirds that take away 1-2 prayers per hit; kill them immediately upon seeing them. They are a priority.
Tz-Kek: They are lava monsters that, when killed, split into 2, and you have to kill them one by one.
Tz-Kek: These are the monsters into which the previous one is divided.
Tok-Xil (Ranger): These monsters hit hard with ranged attacks. You have to be careful with them in the waves that appear with other monsters like the Ket-Zek (Magic) or Yt-MejKot (Fighter).
Yt-MejKot (Fighter): This NPC's power is that it can heal itself if attacked in melee; safespot it and kill it from a distance to disable its power.
Ket-Zek (Magic): These monsters hit with Magic and Melee if you stand close. The strategy to kill them is to use Protect from Magic prayer and never get close to them, so they don't hit us with Melee.
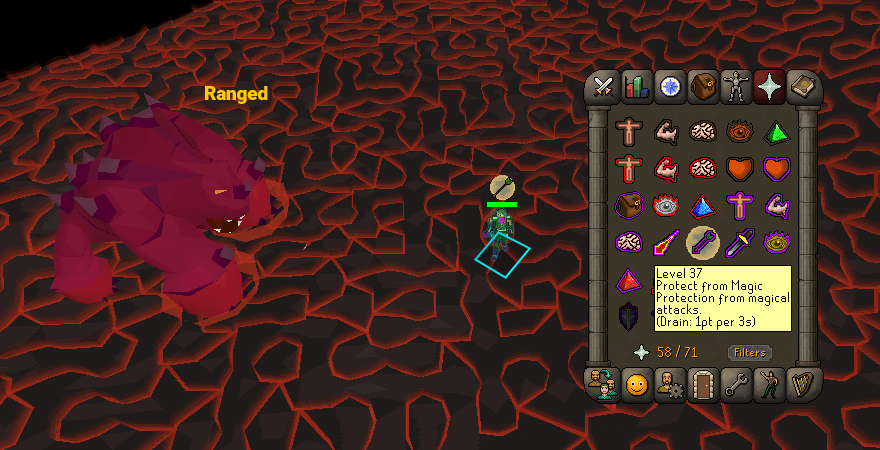
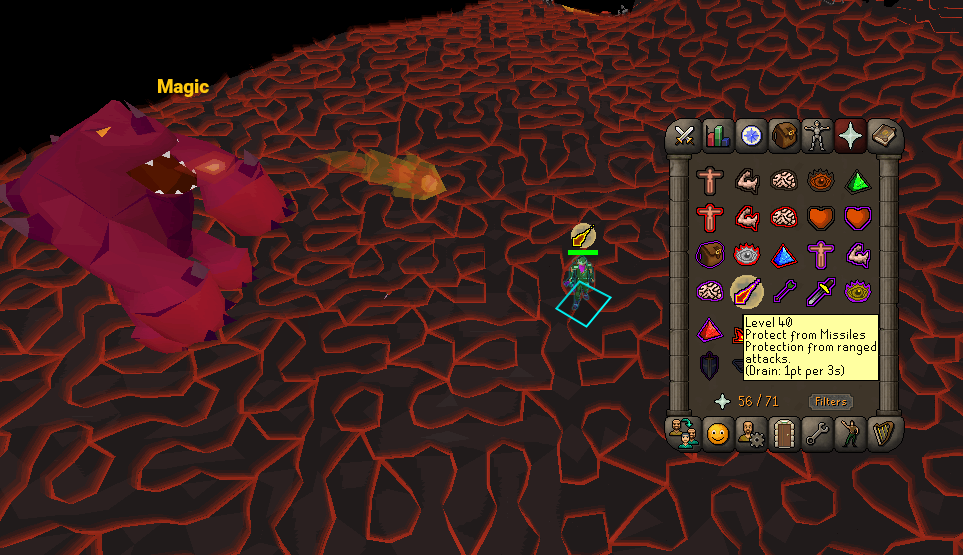
TzTok-Jad (Final Boss): This is the most important monster in the entire minigame; it's the boss that you must defeat at Wave 63. It attacks with all three combat styles: Melee, Ranged, and Magic. Pay close attention to its animation, as it will determine which attack it uses next.
If it hits the ground hard, it means it will attack with Ranged.
If it raises its two front legs and remains extended in the air, it means it will attack with Magic.
He will attack you with Melee if you get too close to him.
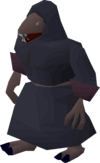
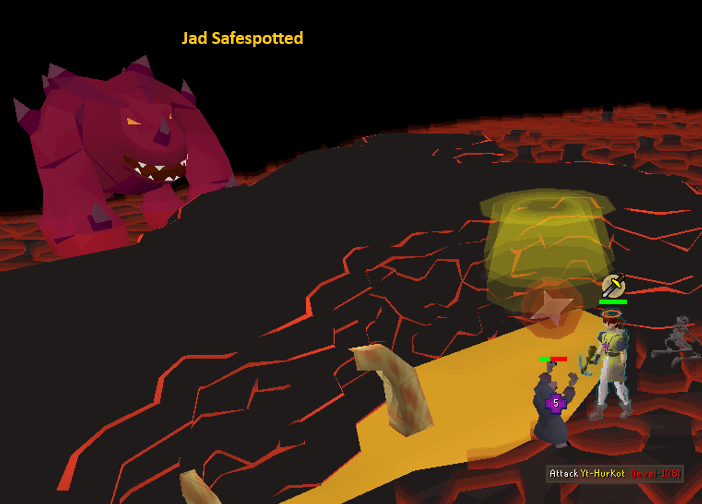
Yt-HurKot (Jad Healers): When you bring the Jad down to half health, 4 healers will spawn who will heal the Jad. You must attack these healers before they fill the Jad to full health (or they will respawn when you kill them). You can choose to kill them or attack them, pass under the Jad, and leave them behind until you finish killing the Jad, because if they have aggro on you, they will not be able to continue healing the Jad.
Safespots
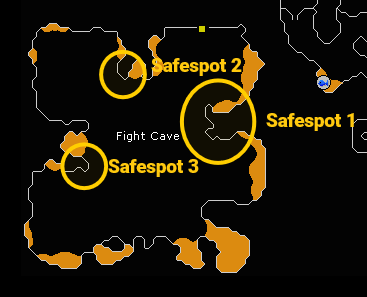
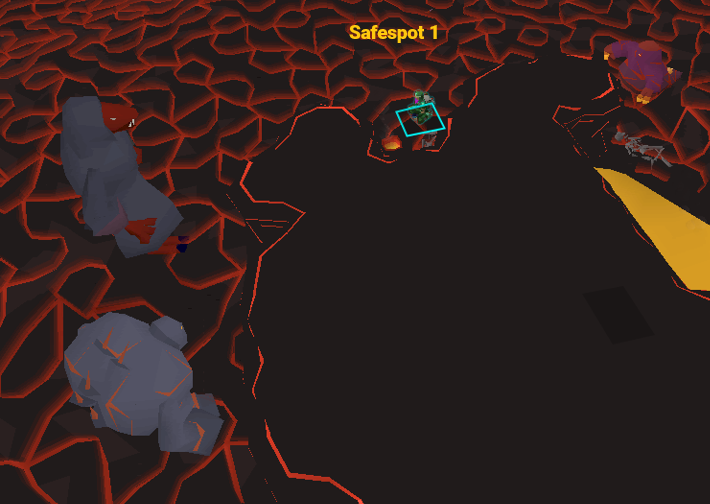
Within the Fire cape Minigame, you will enter a kind of hell with 4 platforms, each with a safe spot you can use to your advantage if you know how.
Lure Tiles
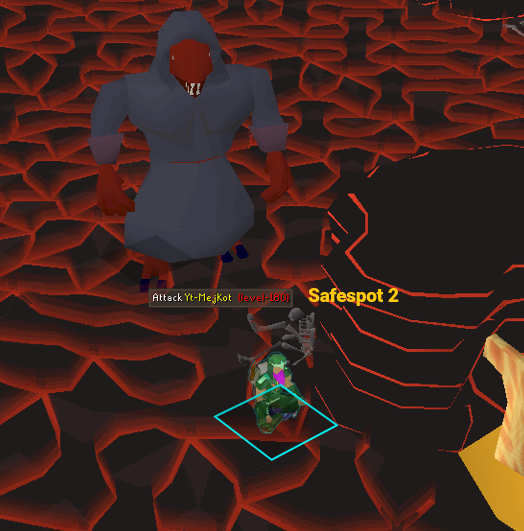
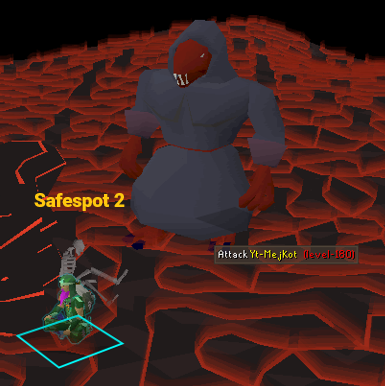
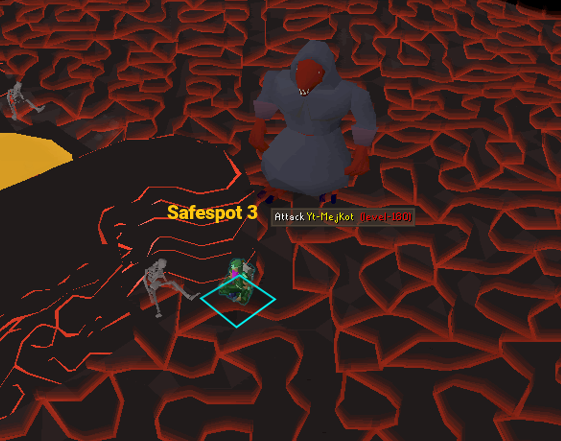
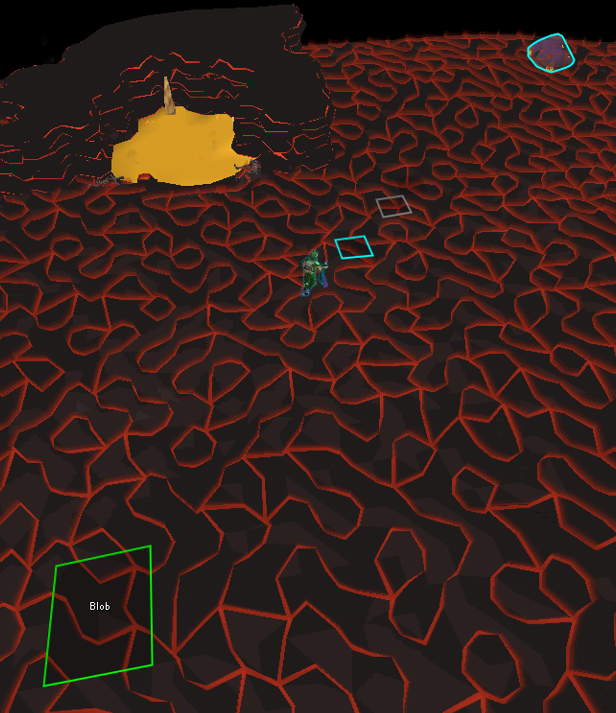
Mark the floor tiles where you see each monster can pass. Each monster is slightly larger than the next, and if you master this technique, you'll know where to position yourself to face each NPC 1 vs 1 without having to deal with prayer changes.
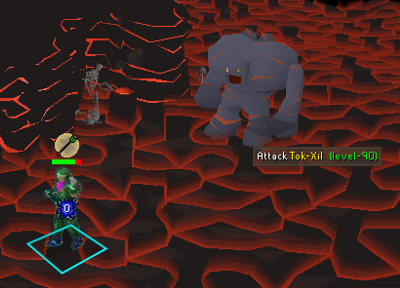
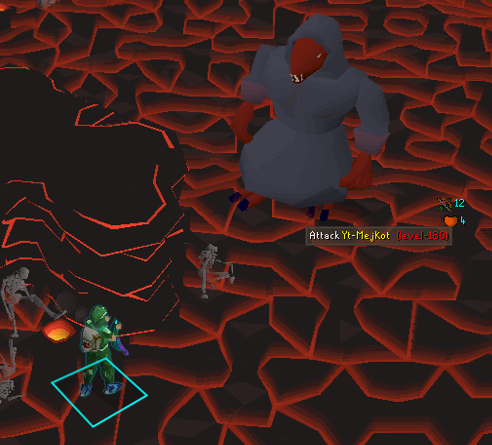
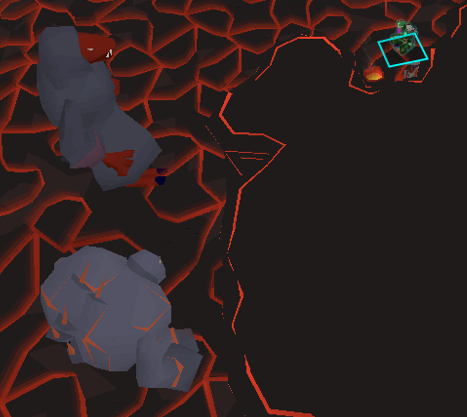
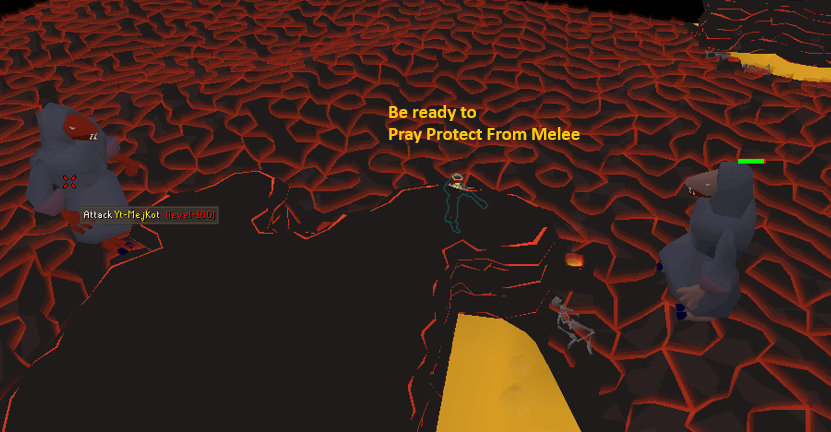
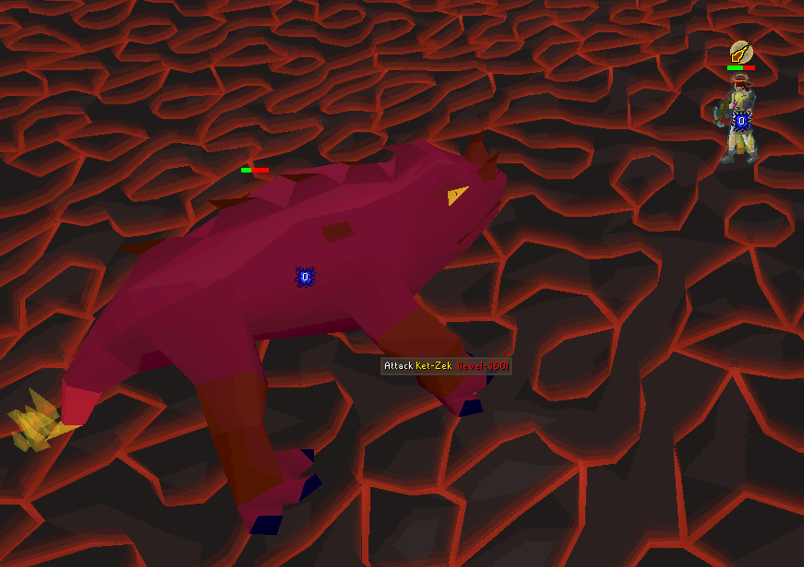
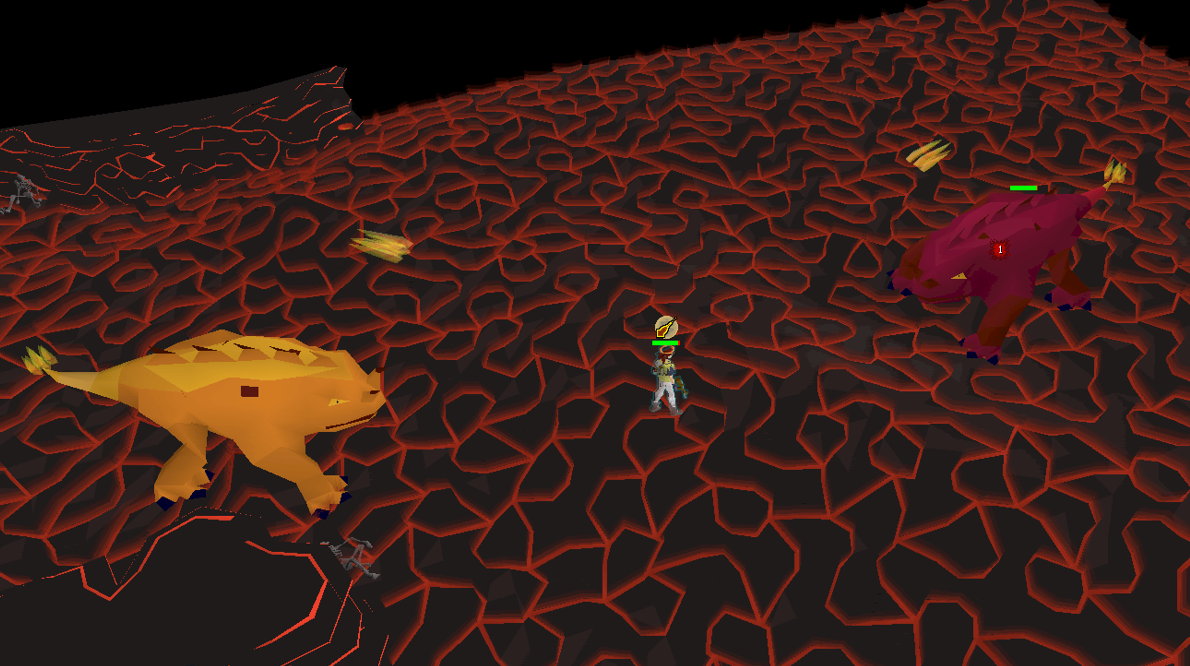
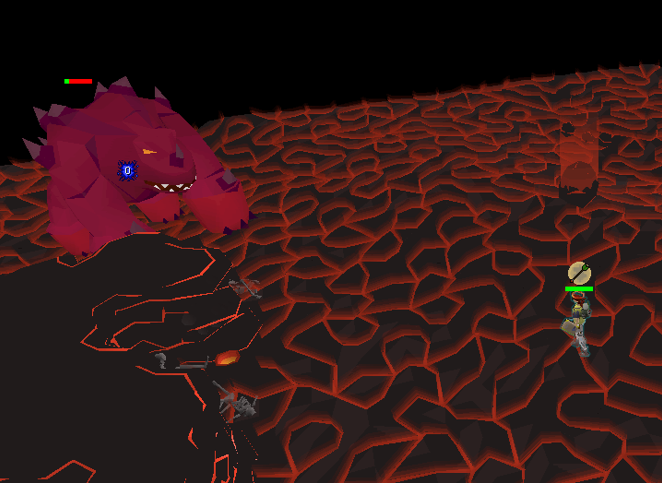
There are specific tiles that, if marked and understood, can be used to your advantage to trap NPCs based on their size. These range from the smaller Tok-Xil (Rangers) to the larger Ket-Zek (Magers). Here, you can see how positioning yourself on the Tok-Xil (Rangers) tile forces it from behind the wall to engage you.
Level 90: Tok-Xil (Ranger) Tile example
Level 180: Yt-MejKot (Fighter) Tile example
Level 360: Ket-Zek (Magic) Tile example
Once you have mastered this technique, you can apply it to the Tz-Kih level 22 (firebirds) and even the final boss, Jad, if necessary. Apply it at your convenience when attempting Fight Caves.
Fire Cape RuneLite Plugin
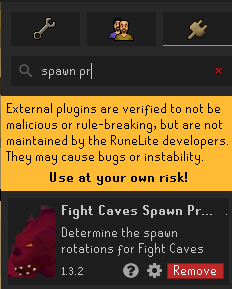
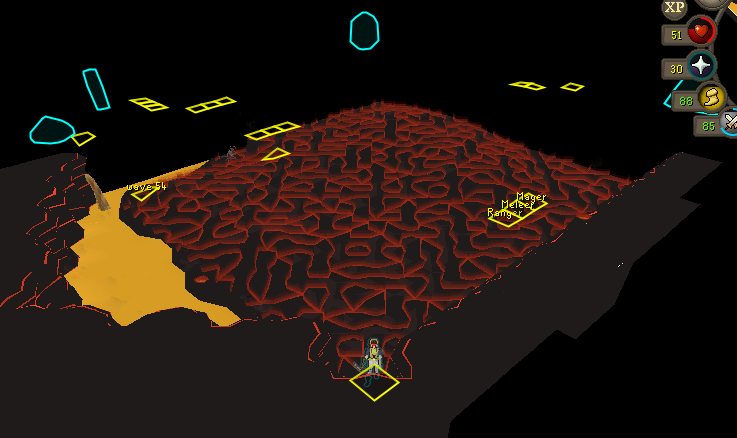
Install the Fight Caves Spawn Predictor plugin before your first attempt. It shows which rotation you are in and where the next wave will spawn. It tells you what rotation the minigame is in so you know when to enter.
Not only that, but it also tells you where the next monsters are going to spawn, so you know where to position yourself in your next wave to minimize the risk of damage and maximize supply savings.
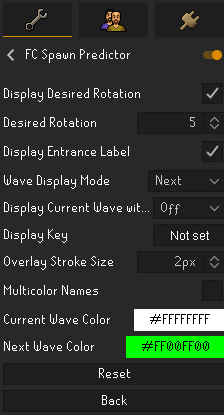
Make sure the settings look like this before entering an attempt:
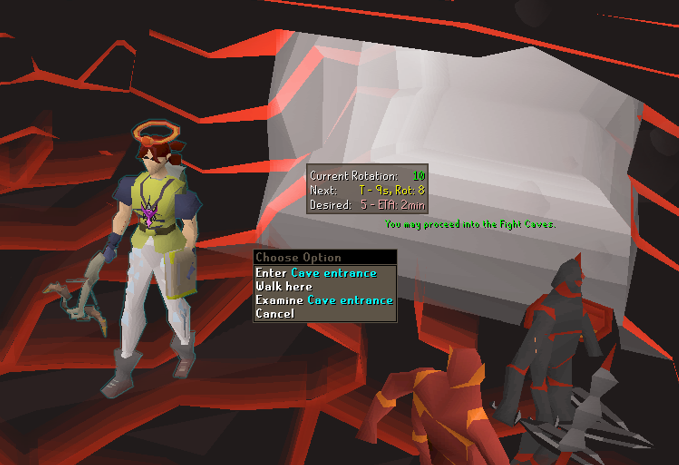
Once the plugin is activated and set up, stand facing the cave and wait for it to determine its current rotation. Choose the easiest one (Rotation 5).
Then enter the cave. Once inside, you'll be able to see where the next NPCs will spawn, helping you position yourself strategically.
Fight Caves Waves (1-63)
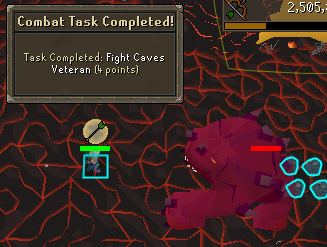
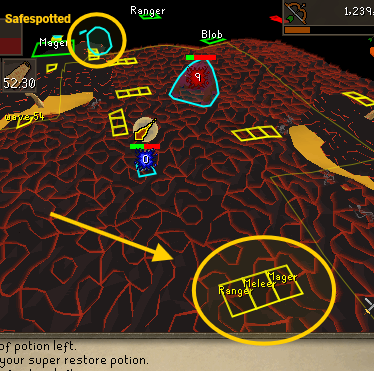
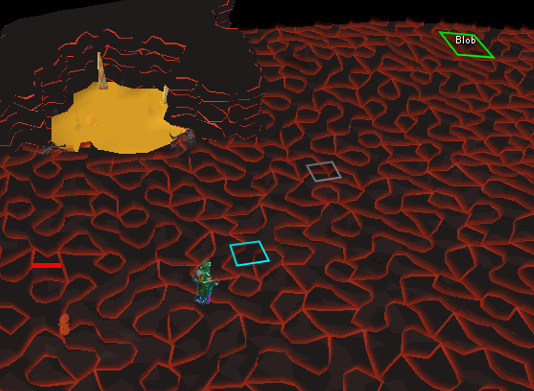
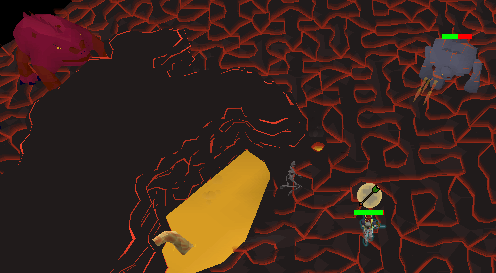
A trick for Fight Caves is to tag each monster so you can see its location from a distance, as shown in the image below. For example:
Here you can see how you can face an NPC 1 vs 1, making the others wait at a safe spot while you deal with this one. Check where the next waves will spawn before moving on to the next wave, so you know where to position yourself.
Waves 1-6
In the first waves, you only need to maintain your distance from the Tz-Kih Level 22 (firebirds), as being hit by them will drain your prayer.
Wave 1
Tz-Kih level 22 (1)
Wave 2
Tz-Kih level 22 (2)
Wave 3
Tz-Kek level 45 (1)
Wave 4
Tz-Kek level 45 (1)
Tz-Kih level 22 (1)
Wave 5
Tz-Kek level 45 (1)
Tz-Kih level 22 (2)
Wave 6
Tz-Kek level 45 (2)
Be ready for wave 7 to activate Prayer Protect from Missiles.
Waves 7-14
In waves 7 to 15, you will have to use Protect from Missiles, focusing on killing the Tok-Xil (Ranger) first and then the other NPCs without Prayer since they are low level.
Wave 7
Tok-Xil level 90 (1)
Wave 8
Tok-Xil level 90 (1)
Tz-Kih level 22 (1)
Wave 9
Tok-Xil level 90 (1)
Tz-Kih level 22 (2)
Wave 10
Tok-Xil level 90 (1)
Tz-Kek level 45 (1)
Wave 11
Tok-Xil level 90 (1)
Tz-Kek level 45 (1)
Tz-Kih level 22 (1)
Wave 12
Tok-Xil level 90 (1)
Tz-Kek level 45 (1)
Tz-Kih level 22 (2)
Wave 13
Tok-Xil level 90 (1)
Tz-Kek level 45 (2)
Wave 14
Tok-Xil level 90 (2)
Waves 15-20
Upon reaching wave 15, the Rangers will stop spawning until wave 21, so you can turn off Prayer and always use a safe spot to kill the Yt-MejKot (Fighters).
Wave 15
Yt-MejKot level 180 (1)
Wave 16
Yt-MejKot level 180 (1)
Tz-Kih level 22 (1)
Wave 17
Yt-MejKot level 180 (1)
Tz-Kih level 22 (2)
Wave 18
Yt-MejKot level 180 (1)
Tz-Kek level 45 (1)
Wave 19
Yt-MejKot level 180 (1)
Tz-Kek level 45 (1)
Tz-Kih level 22 (1)
Wave 20
Yt-MejKot level 180 (1)
Tz-Kek level 45 (1)
Tz-Kih level 22 (2)
Waves 21-30
From wave 21 to 31, you will need to start activating Prayer Protect From Missiles, as a Ranger will spawn until wave 31. Start the wave near a Ranger to first
kill it and then kill the Yt-MejKot (Fighter) in a safe spot, saving Prayer points that you will need later.
Wave 21
Yt-MejKot level 180 (1)
Tz-Kek level 45 (2)
Wave 22
Yt-MejKot level 180 (1)
Tok-Xil level 90 (1)
Wave 23
Yt-MejKot level 180 (1)
Tok-Xil level 90 (1)
Tz-Kih level 22 (1)
Wave 24
Yt-MejKot level 180 (1)
Tok-Xil level 90 (1)
Tz-Kih level 22 (2)
Wave 25
Yt-MejKot level 180 (1)
Tok-Xil level 90 (1)
Tz-Kek level 45 (1)
Wave 26
Yt-MejKot level 180 (1)
Tok-Xil level 90 (1)
Tz-Kek level 45 (1)
Tz-Kih level 22 (1)
Wave 27
Yt-MejKot level 180 (1)
Tok-Xil level 90 (1)
Tz-Kek level 45 (1)
Tz-Kih level 22 (2)
Wave 28
Yt-MejKot level 180 (1)
Tok-Xil level 90 (1)
Tz-Kek level 45 (2)
Wave 29
Yt-MejKot level 180 (1)
Tok-Xil level 90 (2)
Wave 30
Yt-MejKot level 180 (2)
When 2 Yt-MejKot (Fighters) enemies appear, be sure to activate the Prayer Protect From Magic, as wave 31 is coming, where a level 360 Magic NPC will spawn. This NPC can kill you in two hits, or even one, so don't turn off this Prayer until you reach the Jad. (Unless you've already killed the Magic NPC)
Waves 31-37
From wave 31 to 38, you won't need to keep an eye on other NPCs since they will only spawn at low levels, apart from the level 360 Magic. Always keep Protect from Magic active.
Wave 31
Ket-Zek level 360 (1)
Wave 32
Ket-Zek level 360 (1)
Tz-Kih level 22 (1)
Wave 33
Ket-Zek level 360 (1)
Tz-Kih level 22 (2)
Wave 34
Ket-Zek level 360 (1)
Tz-Kek level 45 (1)
Wave 35
Ket-Zek level 360 (1)
Tz-Kek level 45 (1)
Tz-Kih level 22 (1)
Wave 36
Ket-Zek level 360 (1)
Tz-Kek level 45 (1)
Tz-Kih level 22 (2)
Wave 37
Ket-Zek level 360 (1)
Tz-Kek level 45 (2)
Waves 38-44
In these waves, Tok-Xil (Rangers) and Ket-Zek (Magers) will appear at the same time. Wait in a safe spot, step onto the Ranger's lure tile so it comes to you alone, and kill it within Protect from Missiles. Then switch to Protect from Magic for the Mager. If you ever find yourself in a tight spot and the Tok-Xil (Rangers) and Ket-Zek (Magers) spawn at the same time, make sure to kill the Ranger first and then focus on the other.
Wave 38
Ket-Zek level 360 (1)
Tok-Xil level 90 (1)
Wave 39
Ket-Zek level 360 (1)
Tok-Xil level 90 (1)
Tz-Kih level 22 (1)
Wave 40
Ket-Zek level 360 (1)
Tok-Xil level 90 (1)
Tz-Kih level 22 (2)
Wave 41
Ket-Zek level 360 (1)
Tok-Xil level 90 (1)
Tz-Kek level 45 (1)
Wave 42
Ket-Zek level 360 (1)
Tok-Xil level 90 (1)
Tz-Kek level 45 (1)
Tz-Kih level 22 (1)
Wave 43
Ket-Zek level 360 (1)
Tok-Xil level 90 (1)
Tz-Kek level 45 (1)
Tz-Kih level 22 (2)
Wave 44
Ket-Zek level 360 (1)
Tok-Xil level 90 (1)
Tz-Kek level 45 (2)
Waves 45-52
In these waves, only Ket-Zek (Mager) and Yt-MejKot (Fighter) are present. Be aware of where the Magic spawns, so you can position yourself nearby, use it as a safe spot, and then focus on Yt-MejKot (the fighter), saving you prayer points.
Wave 45
Ket-Zek level 360 (1)
Tok-Xil level 90 (2)
The following waves will be practically the same as wave 45, with variations where they will add low-level monsters, so let’s jump to wave 49.
Wave 46
Ket-Zek level 360 (1)
Yt-MejKot level 180 (1)
Wave 47
Ket-Zek level 360 (1)
Yt-MejKot level 180 (1)
Tz-Kih level 22 (1)
Wave 48
Ket-Zek level 360 (1)
Yt-MejKot level 180 (1)
Tz-Kih level 22 (2)
Wave 49
Ket-Zek level 360 (1)
Yt-MejKot level 180 (1)
Tz-Kek level 45 (1)
Wave 50
Ket-Zek level 360 (1)
Yt-MejKot level 180 (1)
Tz-Kek level 45 (1)
Tz-Kih level 22 (1)
Wave 51
Ket-Zek level 360 (1)
Yt-MejKot level 180 (1)
Tz-Kek level 45 (1)
Tz-Kih level 22 (2)
Wave 52
Ket-Zek level 360 (1)
Yt-MejKot level 180 (1)
Tz-Kek level 45 (2)
Waves 53-62
These could be considered the most difficult waves. At the beginning of each wave, make sure you're in the northeast area (next to the entrance) for better wave control. This will be your starting point at the beginning of each wave from now on.
Wave 53
Ket-Zek level 360 (1)
Yt-MejKot level 180 (1)
Tok-Xil level 90 (1)
Wave 54
Ket-Zek level 360 (1)
Yt-MejKot level 180 (1)
Tok-Xil level 90 (1)
Tz-Kih level 22 (1)
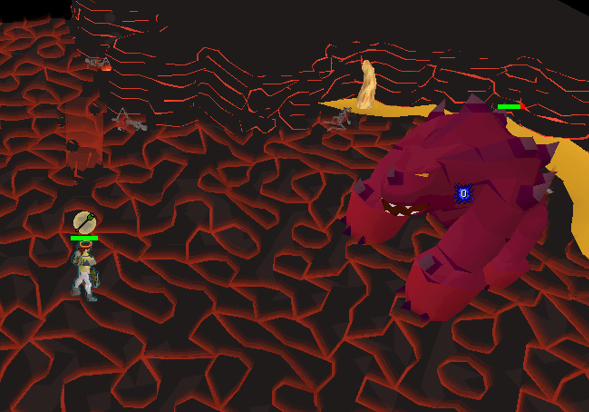
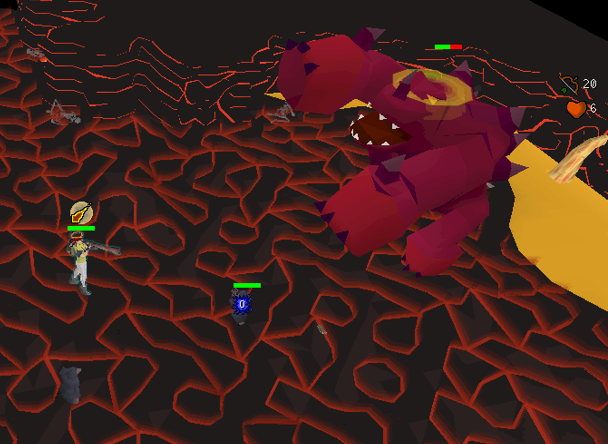
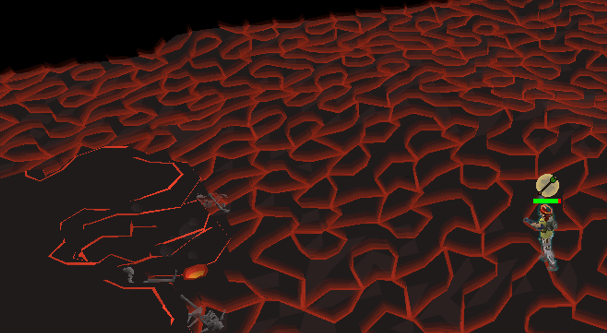
Kill Ranger, then tank 1 melee hit and safespot using Protect from Magic prayer:
Wave 55
Ket-Zek level 360 (1)
Yt-MejKot level 180 (1)
Tok-Xil level 90 (1)
Tz-Kih level 22 (2)
Wave 56
Ket-Zek level 360 (1)
Yt-MejKot level 180 (1)
Tok-Xil level 90 (1)
Tz-Kek level 45 (1)
Wave 57
Ket-Zek level 360 (1)
Yt-MejKot level 180 (1)
Tok-Xil level 90 (1)
Tz-Kek level 45 (1)
Tz-Kih level 22 (1)
Run to the same Fight Cave Zone I went to and use Protect from Magic:
Wave 58
Ket-Zek level 360 (1)
Yt-MejKot level 180 (1)
Tok-Xil level 90 (1)
Tz-Kek level 45 (1)
Tz-Kih level 22 (2)
Wave 59
Ket-Zek level 360 (1)
Yt-MejKot level 180 (1)
Tok-Xil level 90 (1)
Tz-Kek level 45 (2)
Wave 60
Ket-Zek level 360 (1)
Yt-MejKot level 180 (1)
Tok-Xil level 90 (2)
Wave 61
Ket-Zek level 360 (1)
Yt-MejKot level 180 (2)
Wave 62
Ket-Zek level 360 (2)
Before killing the second Mager, make sure to restore and boost your stats to start the Final Boss Jad Fight.
Wave 63: Tz-Tok-Jad
Tz-Tok-Jad level 702 (1)
Yt-HurKot Healers level 108 (4) (Mid-Fight)
When starting Jad, you will need more calm and focus only on the prayer switching, since one mistake can one-shot us.
Jad Healers
Upon reaching the first half of Jad’s life, healers will spawn whom you must attack immediately so that they focus on you instead of the boss.
With the healers' aggro on you, you can go behind the wall to safespot Jad and kill the healers 1 vs 1 with Protect from Melee Prayer.
After killing the healers, you can go back to focus on Jad.
Receiving Fire cape
My first cape took 10 attempts. If you die, note the wave that killed you and practise that wave first.
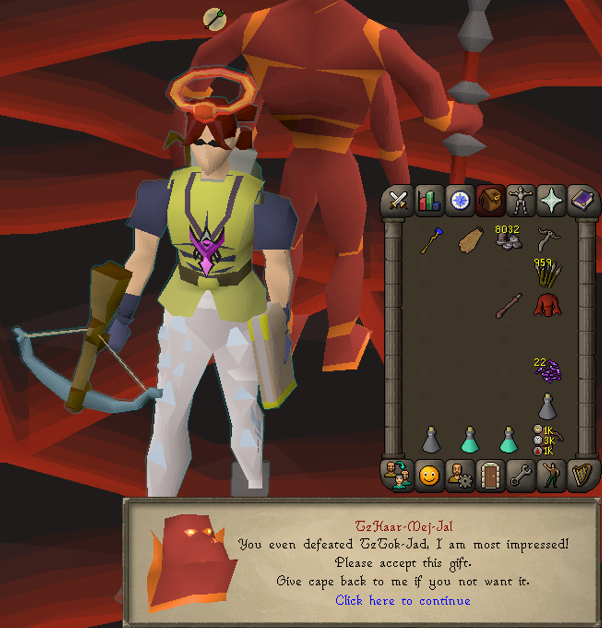
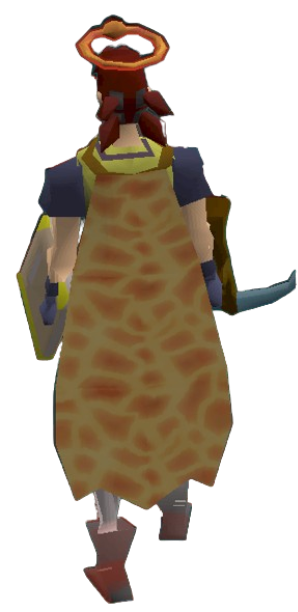
Once defeated, you appear outside the cave with our reward: Fire cape! It will automatically appear in your inventory; if you don't have enough space, the fire cape will remain on the floor until it disappears, so be careful.
Good luck with your first Fire Cape.
Fire Cape FAQ
How long does it take to get a fire cape?
A fire cape run takes 40 minutes with a toxic blowpipe and the main setup in this guide. Our workers' runs range from 40 minutes to 3 hours depending on stats, gear, and supplies.
Can you get a fire cape without a toxic blowpipe?
Yes. You can clear the Fight Caves with a magic shortbow, a rune crossbow, a Dorgeshuun crossbow,w or the bow of your preference. This guide's Ironman setup uses the Dorgeshuun crossbow. Pick the one that matches your experience with the game.
What happens at Jad's half health?
Four level 108 Yt-HurKot healers spawn when Jad drops to half health and heal him. Attack them right away so they target you instead of Jad. If you let them heal Jad to full, the healers will respawn after you kill them.
What happens if you die in the Fight Caves?
Being defeated by any monster ends the fight cave run, and you restart from wave 1. You must wait 5 minutes before trying again.
Which Fight Caves rotation is easiest?
Rotation 5 is the easiest. The Fight Caves Spawn Predictor plugin shows the rotation you are in and where the next wave spawns. Stand facing the cave, wait for the plugin to read the rotation, and enter only when the plugin tells you to.
Alberjma is an experienced Old School RuneScape player with over 15 years of in-game knowledge. He began his journey with LuckyCharmGold as a trusted service provider in the Discord server and, after four years of dedication, was promoted to Copywriter on the website. Originally from Colombia, Alberjma officially joined LuckyCharmGold as an Author in 2025. He uses his years of gameplay and passion for OSRS to craft informative and helpful content for players of all experience levels.
✍️
Know OSRS as well as Alberjma?Get paid to write guides.
We're looking for native English OSRS writers with real game experience. $30–100 per article · full-time or part-time · work from anywhere.


 75+ Ranged
 43+ Prayer
 60+ Hitpoints